Children's drawings briefcase. How to draw a school bag. Stages of drawing a school bag
The easiest way to decorate any interior is with paintings, panels and posters. And if ordinary, flat paintings seem too banal to you, then you can create original three-dimensional compositions. You don't have to be a professional designer or artist to do this. In this article we will talk about how you can create paintings from paper flowers with your own hands, so that your interior will be decorated with a beautiful and unusual craft made by you.
Three-dimensional painting with flowers
To make a beautiful and original painting you will need the following:
- A three-dimensional frame that can be purchased at any craft store.
- Postcard paper, fabric or colored cardboard in a suitable color.
- Paper artificial colors.
- Hot glue gun.
- Aerosol glue.
- Scalpel or stationery knife.
- Metal ruler.
- Wire cutters.
Sequence of actions:
- Remove the back wall of the frame. As a rule, it is made of thick brown cardboard.
- Apply spray adhesive to the cardboard and glue colored paper or other material of your choice on top.
- Let the glue dry, and then trim the protruding edges of the material to fit the base.
- Select flowers and other little things so that you can use them to create a beautiful composition. Try everything on in its place.
- Using a hot glue gun, secure the artificial flowers inside the three-dimensional frame.
Important! Try to make sure that the droplets of glue are hidden behind the leaves and stems of flowers and are not noticeable.
In principle, the picture is already ready. All that remains is to decide whether to frame the glass or not.
Important! If you insert glass, then dust will not accumulate inside the painting made of paper flowers with your own hands. But in a panel without glass you can glue voluminous paper flowers that will beautifully protrude beyond the edges of the frame.
3D paper painting
In addition to the above-described option for creating wall decor, you can also try to make a three-dimensional picture in the shape of a heart. To make it you will need the following:
- Frame with deep sides.
- Stationery knife.
- Colored cardboard with a bright print.
- Pencil.
- Thin cardboard and white watercolor paper.
- PVA glue.
- Scissors.
- Ruler.
Important! Instead of a purchased frame, you can use a candy box.

Sequence of actions:
- Cut a rectangle from a white sheet of paper to fit the selected frame.
- Draw by hand or print a heart of such a size that it can easily fit into the frame 9 times in 3 rows.
Important! The approximate size of one heart is 5x4 cm.
- The heart needs to be cut out and circled with a pencil, placing it on previously prepared white paper. There should be 3 rows of 3 hearts.
- Now comes the important step - using a utility knife, carefully cut out the “wings” of the hearts. To do this, make cuts along the contour of the hearts, without touching the upper and lower parts.
- Bend the cut parts of the hearts up and towards the center, making them voluminous.
- The blank with hearts must be glued onto colored cardboard.
Important! It is desirable that it be scrap paper with some beautiful small pattern. It will be visible through the bent “wings” of the hearts.
- The final step is to place the composition in a frame and secure it with glue or a stapler.
Important! Based on this master class, you can make your own 3D plot, for example, fluttering birds, butterflies, people or other original patterns.
It is very noteworthy that today more and more owners prefer to decorate the interior of their homes with handmade paintings. And this is wonderful, because the variety of modern materials allows you to make handicrafts using all kinds of techniques. It’s great that such handwritten creations can not only be hung on the walls of your home, but also presented as a gift to loved ones, colleagues or even children.
It is a common mistake to think that a picture is something drawn on a piece of paper. But in our modern times, it is a design element that is performed using completely unusual techniques.

Today you can find a large number of photos of homemade paintings on the Internet, they will help you decide on the direction and design of future products.

In this article we will describe several of the most interesting master classes on how to make beautiful and, most importantly, unique paintings. It is important that the following techniques for the manufacture of such decorative elements will not require exorbitant sums. And the list of necessary materials will not be prohibitive.

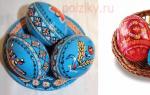
Paintings using beads
Surely you know a lot of materials from which you can make a beautiful picture. In addition to the painted products we are familiar with, there is a very remarkable technique using beads that will sparkle with bright colors on the walls of your kitchen or bedroom.

Depending on the chosen theme, the product can be hung in a child’s room or in the living room.


Let us note that this type of creativity requires considerable physical effort and time, but the result will exceed all your expectations and will certainly attract the attention of household members and guests.

To make it you will not need many materials, half of which can always be found in any home:
- frame on a strong frame;
- finished painting (pre-printed);
- small size beads (1-2 mm);
- superglue;
- dental stick.

The process of doing the work is simple. To begin, take the base (frame) of our future painting and glue the selected drawing onto it. Next, carefully begin gluing the beads, distributing them evenly on the canvas.

Do not allow the formation of empty “holes”; for this you should use a toothpick, with which it is easier to reach the smallest corners of the picture.

Carry out this procedure separately, that is, visually divide the canvas into several elements and gradually fill these parts with beads. When finished, let the painting dry completely by placing it in a vertical position.


If necessary, you can arrange a beaded masterpiece in a beautiful frame and then select the most suitable place for the product.

Custom fabric paintings
Here is another interesting idea with which it is easy to make a picture. In this manufacturing method, you do not need to come up with patterns, composition and select paints or pencils. Here the only useful idea is how to choose the right fabric for the interior according to color and shape.

It is not at all important that intricate plots are depicted on the fabric - the choice of elegant abstractions that can be played on canvases of different sizes to create overall harmony is quite suitable.


It’s very easy to make such modular paintings at home, the main thing is to find suitable fabrics and choose the perfect stretcher. One large pattern or drawing looks harmonious, smoothly stretching across two or three paintings.

"Golden" paintings
Sounds expensive, doesn't it? But in making paintings from gold you will not need to spend a lot of money; on the contrary, the necessary materials can be easily found in simple stores selling building materials or household goods. And the technique itself is extremely simple, and even a schoolboy can handle it.


So, for work you will need:
- thick cardboard or a piece of unnecessary flat plywood;
- plain fabric;
- acrylic paint;
- glue in stick;
- brush;
- a twig from any nearby growing tree;
- aerosol with gold paint.

Work process
We cover our base with fabric, carefully smoothing all the edges to avoid the appearance of bends or excess glue. After waiting for it to dry completely, we begin painting the fabric. To do this, very carefully apply an even layer of the paint you like and wait for it to dry. This stage can be avoided if you select ready-made colored fabric for our composition in advance.

Now comes the fun part - creating the golden branch. We take a twig and apply it to the dried canvas, and apply aerosol paint on top in a generous, even layer at a distance of 25-30 cm from the painting

Wait for it to dry again. The homemade drawing is ready! If you want to add some zest, you can manually draw in the missing elements: a bird, leaves or berries; You can add rhinestones and beads for more pomp.

Conclusions
As we found out, each of us can create a truly unique masterpiece in a single copy for the interior. Not only a mother on maternity leave or an art student can make paintings. Creating such paintings brings people together, so working on them is perfect for a young couple or a mother with a child.


On the Internet you can easily find many ways and instructions on how to make a picture. It is worth noting that sometimes the cost of materials and tools will cost a little more than a ready-made purchased product, but the result of your own work relegates this drawback to the background.


Develop your imagination and creative skills and you will certainly be able to please your family and friends, because a handmade painting is an ideal housewarming gift, a boss gift, or just a good friend’s birthday gift.

Photos of paintings made by yourself


Anton Tsugunov
Reading time: 6 minutes
Paintings are one of the components of the warm and unique atmosphere. And if the paintings are made independently, the emotional “response” from them can be an order of magnitude higher than that of purchased ones. created with your own hands - you will see photos of examples below - thoughtfully thought out and lovingly brought to life, they will give you a good mood for a long time.
Let you not have the talent of an artist, do not shine with creative flair and doubt your taste. Cast aside your doubts. Having a desire to create original paintings for the interior, you can learn some techniques on your own and after a while admire the creation of your own hands.
Looking for an idea for a painting
Inspiration is a fickle and timid thing. Let's not wait for inspiration from above, but let's actively search for ideas for future paintings for the interior.
Advice. At the very beginning, it will be useful not to look on the Internet in search of ideas. Trust your inner instinct: what exactly do I need, how would I like my painting to look, what mood should it bring into my life and into the interior of my home? Write down all the thoughts that come to your mind.
Information, having gained a critical mass, will definitely “shoot” with an original idea. And having the main features of what you are looking for, you can choose the appropriate technique for creating paintings with your own hands for the interior and look at the photographs.
Anything can serve as an impetus for creativity: from sewing accessories and beads to family photos and letters from the home archive.
Advice. For any mother, a touching option for interior decor will be a panel collage of children's drawings, appliqués, the first cute doodles and other priceless creations of little hands.
Choosing ways to create a picture for your interior
There are many ways to bring creative ideas to life. Paint with watercolors, acrylics, paint in oils, create panels from leather, thread or wool, make posters from photos - the choice is yours. Each of the paintings will be interesting and unique in the interior.
Painting with paints
Even if the talent of a painter has passed you by, you are quite capable of creating abstract paintings for the interior at the “cute and soulful” level. You will need:
- oil, acrylic or watercolor paints;
- tablet or easel;
- canvas;
- brushes;
- palette and palette knife;
- scotch;
- solvent.
Making a sketch
The future of the painting that will decorate the interior of your apartment is first drawn with a pencil on the canvas: a composition is built, small elements and main lines are outlined. The space around the main object is “overgrown” with details, the lines of objects intersect with each other and overlap. This gives the picture depth and volume.
Determining the light source
To make the image more realistic, draw in dark and illuminated areas. Mark where and at what angle the light will fall on the objects, where the shadow, penumbra and highlights will be located.
Choosing colors
In order to choose the right colors for a painting, you need to know that:
- to obtain the desired shade, the paints are mixed on a palette and only then applied to the canvas;
- on a sunny day, the color of the object has golden shades, on a cloudy day – grayish;
- if the subject of the painting is night, the objects will be richer and darker than during the day.
Let's create
Multi-volume works and 6 years of study at the institute are devoted to the art of drawing. At the everyday level, we can give several guidelines in this process:
- draw simple objects first;
- dilute and mix the paints for your painting with a reserve, because you won’t be able to achieve exactly the same shade again;
- Before applying the next layer, the previous one must dry well;
- try different techniques, but focus on two or three that you can do;
- within three days, an image made with oil paints can be corrected, failed details can be corrected, or they can be completely erased.
Advice. If, when starting the picture, you planned a plot in the style of realism, and by the middle of the process you are surprised by abstractionism, it doesn’t matter. Urgently pretend that this is what you intended from the very beginning. Abstract creations are merciful to the mistakes of beginners, and in the interior they look impressive and mysterious.
Bead paintings
We begin to create a masterpiece for the interior.
- Free the frame from the glass.
- Draw the outlines of the frame on the base.
- Paste the pattern on which you will lay out the beads.
- Use thread or wire to mark the contours of the design, gluing them to the base.
- Glue the beads, distributing them tightly, without voids. If this is uncomfortable to do with your fingers, use a toothpick. Apply glue to small fragments, not allowing it to dry.
- Let the painting dry completely by placing it vertically for a while. If somewhere the beads are not glued well, they will fall off and you can re-attach them.
- Frame your beaded item, hang it on the wall and admire the transformed interior.
Painting for the interior from scrap materials
To make the work of your hands, intended for the interior of your home, interesting, do not limit your imagination to any specific techniques. Combine, break the rules, create your own recipes.
Various decorative and natural materials can be used: leather, fabric, buttons, sequins, quilling elements, wallpaper, dried flowers, sea pebbles, shells and even wool. The painting for the interior made of wool is worth considering in more detail.
Painting with wool
Wool painting is a whole art from an unexpected perspective. This is where you don’t have to worry about your artistic abilities: a sketch of a drawing can also be applied under a stencil. Warmth, depth, volume are just a few of the epithets for such a work. A painting made of wool breathes, lives its own life and brings special warmth to the interior.
You will need:
- clamping frame;
- non-woven or flannel backing;
- scissors, tweezers;
- wool of different colors.
Now we begin to paint a picture with wool.
- Draw a sketch on the base.
- Start laying out the wool with the main background color, and then lay out the wool of other colors in layers. You can apply the wool by pulling it into a strand, plucking it into a “cloud”, or tearing it off. Each method creates a different effect: delicate color transitions, transparency or richness of texture, light haze or dense fluffy balls of fur.
- Give wool objects the desired shape: convexity, texture, layering.
Important! Sometimes apply glass to the wool composition. This way you will evaluate the intermediate result and be able to eliminate shortcomings in a timely manner.
- Clean the glass with alcohol, press it against the painting with clamps and trim off any protruding hair.
- Secure the frame and enjoy the result.