How to draw a little mermaid underwater palace. Step by step instructions on how to draw a mermaid. Cartoon character Ariel and the lovely mermaid Barbie
I wrote this lesson specifically for our reader Anya Goryainova. There were many requests to do a lesson on that. I searched the Internet for several examples. I liked the Dragoart lesson the most. This is the kind of little mermaid we will try to draw.
How to draw a mermaid step by step:
STEP 1. Let's start with a sketch. We draw with lines the position in which Ariel is located. We start by drawing the shape of the head and move on to the body. Make a rounding on the chest, and also note that its tail forks like a fish. 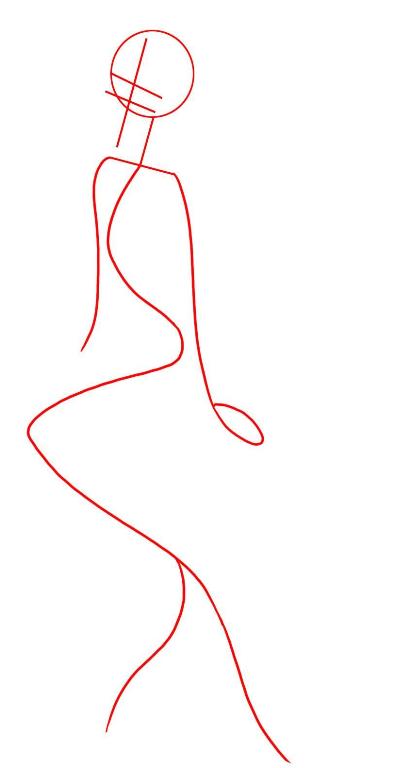 STEP 2. Draw the hair. Look carefully at their shape, try to draw them as accurately as possible.
  STEP 3. Draw the face. Let's start by drawing the nose, later moving on to the eyes. Draw two small circles for her eyes and then make black pupils. Let's move on to drawing the princess's neck and chest. Please note that one arm will not be fully visible. Let's draw shells on the chest.
  STEP 4. Draw the second hand. Immediately try to depict it in detail, with fingers. There’s not much to write about, everything is clear here, the lines are simple. You can also see how to draw a dragon's tail. They are very similar.
  STEP 5. And we move on to detailing the drawing. Let's add fins to her tail and make the lines of Ariel's body clearer. We erase the auxiliary lines that we drew at the beginning of drawing and outline the contours. This is how it should look:
  Like a real lazy “artist,” I spent a lot of time and effort on this picture, but I’m happy with the result. This is how I got the Little Mermaid:
  I also colored it with colored pencils:
  How do you like my Ariel? Show your work and write in the comments what other lessons to prepare. You can also look at drawing lessons for other cartoon characters, for example.

The topic of this lesson is “How to draw a mermaid” step by step with a simple pencil. To learn how to draw pictures of mermaids, you need to correctly be able to draw girls and the tail of a dolphin or large fish. A mermaid is half fish, half human. In addition, to make the drawing more realistic, you need to draw the mermaid not only the tail, but also the fish scales on it. Required condition for a picture of a mermaid there must be a reservoir or sea, because they live only in water.
1. Draw a curved line for the mermaid’s body

As always, we begin the drawing by drawing the main outline of the mermaid - her torso. Draw a downward curved line and add another line for the shoulders and dividing line mermaid's tail and body. The picture will turn out beautiful and accurate if at this stage you make the contour markings correctly.
2. Contours of the head, belly and tail

At this stage you need to draw a circle above the shoulders for the mermaid's head. In addition, you need to draw the waist and hips, and also outline how the tail fin will be located in the drawing.
3. Let's draw the shape of the mermaid's body and tail

In any picture, a mermaid always looks beautiful and graceful, because, according to myths, she has unusual attractiveness and beauty. The arm bent at the elbow only emphasizes her “charms”. At this stage of the drawing, it is enough just to outline the position of the mermaid’s bent arm with a contour line. But the shape of the body and tail needs to be drawn completely.
4. Draw the head and arms of a mermaid

Now draw both hands and remove the extra ones from the drawing contour lines pencil. Mermaid drawing almost ready. All that remains is to draw the hair and face.
5. How to draw a girl's face

Try to draw the face as beautifully as possible. Beauty is her “weapon” and the main magic. Add to mermaid drawing and others small parts: a headband for the hair, a belt on the stomach and draw the tail fin in detail.
6. The final stage of the drawing

On final stage easier to draw. The drawing of the mermaid is almost complete, all that remains is to draw the scales on the tail, shade or color the picture, add a few details to the mermaid’s “outfit” and of course draw the sea.
What would a sailboat be without romantic myths about mermaids? In the old days, sailors were afraid not so much of the storm as of the magical spell of mermaids, which is why they installed a wooden female figure at the stern of the ship.
You will definitely get accurate drawings of dolphins if you draw them step by step, first with a simple pencil, and then color them with paints or colored pencils. If you will be draw a mermaid, then this tutorial will help you draw her tail.
In this lesson you will learn how to draw a Betta fish. She has a lush, wavy long tail and in nature she has an unusual color, as if shimmering with all the colors of the rainbow.
Knowing how to draw the sea will help you when you draw a mermaid. Most often, mermaids are depicted against the backdrop of a gloomy stormy sea, as if symbolizing their bad intentions.
Since a mermaid is half human, before drawing a mermaid, learn how to draw an abstract human figure. This will help you get the proportions right. human body, hands and head.
If you draw a mermaid, you definitely need to be able to draw a girl’s face correctly and beautifully. Try drawing the mermaid's face first before drawing the entire mermaid.
Mermaids are some of the kindest fairy tale characters that occur in the imaginary world. That is why they are one of the most beloved heroines of little girls. There are a lot of mermaid coloring books and figurines all over the world, but you can give one to your daughter by drawing one yourself.

15 shocking plastic surgery, which ended in failure

Surviving in a metropolis: how to stay healthy all year round?

What is a tiny pocket on jeans for?
How to draw a mermaid?
Some simple tips will help you easily draw a beautiful fairy-tale heroine. Having learned to draw, you can always keep your child busy anywhere and give him many happy minutes spent coloring.
- Depending on what the child will draw with, you should choose the thickness of the paper. So, you can draw a mermaid wherever you want, but if the child is going to paint it with paints, then the paper should be chosen thicker.
- Start depicting a mermaid from the head. The oval will be her face, on which you will depict eyes, nose and mouth, and ears on the sides.
- Now start styling your hair. Oblique lines can indicate bangs, wavy lines can indicate thick, long hair. You can also draw a braid over your shoulder. Since the mermaid is also a princess, depict her in a tiara. Draw a triangle on her head and connect its vertices with wavy lines, and erase the extra ones. The hairstyle is ready.
- Draw the neck - these are two concave lines coming from the head. Lengthen them by making the mermaid’s shoulders sloping, and not straightened like a hero. It will look unnatural.
- Round the shoulders and draw the lines down, this will be the base of the mermaid's arms. Place the points from which you will begin to draw the mermaid's body. Draw lines from them that smoothly taper where the waist is, to depict the mermaid’s pelvis, you need to start increasing the distance between them again from the waist. And bring it closer again to draw the tail.
- Draw the fin as a trapezoid. On the upper side, slightly deeper, place a point and from the tops of the trapezoid, draw two lines to it, forming a fin. Erase everything unnecessary.
- Continue drawing the arms; to do this, just below the mermaid’s pelvis draw the hands. Erase all excess again and the mermaid is ready. Next time, try to depict it in motion to delight the child even more.
How to draw a mermaid: options for children


What do people regret most at the end of their lives?

13 signs you're wasting your life but don't want to admit it

20 Signs You've Found the Perfect Guy


How to draw a mermaid: options for adults


Video lessons
In this lesson we will learn draw a mermaid. As in previous lessons, we will draw using a pencil. Each step is detailed and illustrated for easier learning.
Mermaids are very popular mythological creatures that are the main characters of fairy tales, science fiction films and cartoons. Many people dream of learning how to draw these half-maiden, half-fish, which are famous for their beauty and original look. However, it is not always possible to depict a mermaid realistically. The fact is that mermaids, like other creatures, have special proportions and details that should be observed. Of course, no one has seen mermaids, and we can only guess what they really look like, inspired by the images of other artists, but during the time that there have been beliefs in these amazing creatures, their appearance in the imagination of people on all continents has developed approximately the same. The main difficulties when drawing mermaids are: creating an image, the moment of “attaching” the body to the fish tail - the place and shape, as well as the size of the tail itself, the texture of the tail, and so on. We will address these and other questions at step by step lesson for drawing a mermaid Further.
As when drawing any other objects, you should start drawing a mermaid with sketch main lines. In order to make it easier for us to draw all the elements and parts of the mermaid’s body, and not get confused with the proportions, these things must be done at the very first stage. Firstly, you need to immediately imagine what our mermaid will look like and what position she will be in. To determine the position, you can make preliminary sketches on a separate sheet of paper or here with very light pressure of a pencil. After you have decided on the position of the mermaid's body, you need to draw a center line from the head to the tip of the tail. We will divide the center line into two halves - this will be the division of the upper (human) part of the mermaid and the lower (fish) part. The mermaid has the same proportions as ordinary women - the length of the legs (tail) is equal to the entire upper body, including the head.

On the center line we string the main shapes: a circle of the head, a little lower with a distance that needs to be left for the neck - an oval of the upper body and an oval of the hips, between them you can draw a smaller circle, which will indicate the size of the waist. It is worth remembering that the sketch of a mermaid must be drawn with very light pressure from the pencil, so that later all this can be easily removed with an ordinary eraser. On this picture The main lines are made in bold for clarity; in your own drawings you make sketches with barely noticeable lines.

Next we will draw general form tail as it shown on the picture. The tail looks like a large elongated drop. The size of the tail should be approximately equal, sometimes slightly longer, to the total height of the upper body with the head. Previously, we divided the center line into two parts, but the caudal fin is drawn lower, since it no longer belongs to the body, but in human perception is seen as a separate element, almost like a hairstyle on the head, which is also not included in the size and proportions of the body structure. If you make the size of the tail much larger or smaller, then the viewer may experience some kind of dissonance of perception, which will be based on the fact that the presented creature is more human or more fishy, when both parts are the same size or the tail is slightly larger due to the caudal fin, there is a feeling of harmony and conformity. At the end of the tail we schematically draw a forked fin. The fin can be drawn in different ways - it can be simple triangular shape, like a shark, like a guppy fish, or even a completely exotic shape with fringe and additional elements.
At the same stage we showed the shape of the hands. Hands, according to the rules of proportions, reach just below the hips. On initial stage we have shown them as two lines indicating the size of the shoulders, the locations of the elbow and the palms.

At the next stage of constructing our mermaid, we will make the sketch more formalized. Let's connect all our ovals and lines and get general shape mermaids. We connect the head to the body with the neck, then we unite the ovals of the upper body and hips with lines that form the waist. Here we draw the shoulders and general shapes of the arms, which exactly repeat the previously outlined center lines. Thus, now we see the general shape of the mermaid, and all we have to do is bring this shape to its finished form.

After we've finished general construction figure of a mermaid, we don’t have to worry about distorting the proportions when drawing, and now we can proceed directly to drawing. Before continuing, we erase all the center and base lines that we needed during the sketch, since it will be very difficult to remove them later.

When drawing with a pencil, it is best to start drawing from top to bottom, since if you draw the lower parts first, then if you move your hand incorrectly, you can smudge the finished parts. Therefore, we begin to draw the head and hair. We have already covered how to correctly draw the head, eyes, nose, lips, hair, and so on in previous lessons. It is only worth noting that a mermaid’s hair is usually long, fluffy and flutters in the water. Traditional decorations for a mermaid, which can be placed in the hair, on the neck, hands, and so on, are sea plants, shells, and starfish.

Further draw the torso and arms. There are a few things to remember and know here. The mermaid usually does not have clothes, since she lives in water, so her breasts are usually covered with natural movements of the hands, long hair, sea plants or shells, as shown in this picture. Another thing that will make your mermaid more realistic is that the body does not meet the fish tail in a straight horizontal line. Such a line, which sharply demarcates the top and bottom of the mermaid, usually spoils the entire impression of the drawing. As one option: the body turns into a tail with a cone, as we did in this picture, which looks very natural - the tail goes around the bottom of the abs and goes up to the hips. If you draw a mermaid from behind, then the tail usually covers the entire buttocks, since the buttocks suggest a continuation in the form of two legs, whereas fish have a solid tail in this place, which is based on a single spine. It will be even more natural if you make the transition smooth in the form of scales, which, when transferred to human skin, become smaller and rarer and finally disappear. If mermaids existed or really exist, then I think this is exactly what this transition looks like.

Next we need to draw scales and fin. Scales can be drawn in different ways. If you want to create the most detailed drawing, you can draw every scale, like a fish. If you don’t want to worry about drawing such small details, then you can get by with just a hint of scales. This can be done very simply using intersecting strokes. To do this, you need to make strokes first in one direction, bending, reducing and shortening them as you bend and reduce the tail, and then in the other direction so that you get not squares, but diamonds, very similar to the texture of scales. After we have drawn the tail, we draw the fin.

After all the necessary elements are completed, we erase all the extra lines that remained during the drawing process, do a detailed drawing, chiaroscuro or paint over with color.
This concludes the lesson on drawing a mermaid with a pencil step by step. Subscribe to site updates to always be up to date last lessons on drawing and other interesting materials.
Already drew +19 I want to draw +19 Thank you + 232
On this page we have collected the best step by step photos lessons that will help you easily and simply draw a mermaid with your own hands with a pencil step by step. The lessons are suitable for children and beginners. Good luck!
How to simply draw a mermaid step by step for beginners
- Step 1
To begin, use light lines to outline the boundaries of the drawing. This is done in order to avoid inharmonious composition.
- Step 2
Draw the head and chest in the form of an oval in the upper right corner.

- Step 3
Then outline the pelvic part of the mermaid.

- Step 4
How to draw a mermaid. Use neat lines to outline the fish-like tail of the undine.

- Step 5
A diagrammatic representation of the hand structure will make it easier to draw. Dots indicate the places of folds.

- Step 6
Then you can draw the outline of the hand, not forgetting about the anatomical features of human hands.

- Step 7
How to draw a mermaid. Draw the chest and the curve of the back using smooth lines.

- Step 8
Do the same with your hips. They should be round, just like an ordinary woman's. However, do not forget about the transition to the tail.

- Step 9
Draw the mermaid's second hand.

- Step 10
Draw facial features using center lines.

- Step 11
Draw beautiful and cunning eyes, a neat nose and flirtatiously smiling lips.

- Step 12
One of the most exciting steps is hair styling. There are absolutely no restrictions on the artist's imagination.

- Step 13
Draw small and thin hands. Fingers should be graceful.

- Step 14
Erase the extra construction lines, draw a beautiful tail and dress the sea creature to your liking.

- Step 15
Then start shading the finished drawing. Highlights will add special charm and shine to the image. With their help you can convey the texture of a mermaid's tail.

How to draw a mermaid step by step for beginners

- Step 1
At this stage we will create the necessary forms. First, draw the shape of the head, as well as the shape of the body and tail. Draw guide lines for the tail and face.

- Step 2
Next, draw out the shape of the mermaid's face, and after that start drawing out her long, voluminous sea hair. Long, curly and straight lines work well for this style. Instead of drawing bangs, I decided to split her hair into two parts. Once you are done creating the hairstyle of your choice, add some detail to the hair strands.

- Step 3
Using the auxiliary lines of the face, start drawing the eyes, nose and lip lines. The eyelids should be as thick as the eyelashes. Create curved or longitudinal lines for the eyelids and move on to the next step.

- Step 4
Draw gracefully shaped eyebrows and then draw lines for the eyes. Draw the mouth, which should consist of an upper and lower lip.

- Step 5
Continue drawing long and luscious hair, and then you will notice that you have the same hairstyle as in my example. Stay at this step longer and complete all the details, since the mermaid's hair is the key plot of the picture.

- Step 6
Now you have your head and face ready, start drawing the body. Start with the shoulders, arms, and beautiful mermaid breasts. You can draw a cute shell necklace, or you can skip this detail.

- Step 7
Draw the inside of the arm, draw in the hands, and add a pearl bracelet on the wrist. Add some details to this sketch, and then draw in the back and tail.

- Step 8
Great, start giving the lower part of her body a curving shape, paying attention to how the fin should be. The contours of her body should be very voluminous. Add details to the surface of her body and move on to step nine.

- Step 9
On last stage, draw a beautiful fin, as in the example. Once you're done, be sure to have plenty of time to get to the fun stuff. Finally, add the scales on the mermaid's tail and erase the guidelines and shapes you made in the first step.

- Step 10
The drawing is now complete. Choose the right color palette and move on to the most creative part of this lesson.

How to draw a full-length mermaid step by step


Learn to draw a mermaid with a simple pencil
- Step 1
We outline the boundaries of the drawing, using light lines we determine the location of the figure: the line of inclination of the head, the line of the shoulders, the line of the pelvis. We outline the length of the tail and hands. Pay special attention to the curve of the mermaid's torso line.

- Step 2
Thin lines indicate general outlines the mermaid's body and her tail, checking the proportions. Focusing on the production lines, we outline the head, strands of hair, neck, shoulders, collarbones, arms, chest, position of the hands. We draw the facial features and outline the fins. We define zones of light and shadow.

- Step 3
We strengthen the contour of the mermaid’s body, draw out the facial features in more detail, designate small details, arms, fingers, pay attention to the features of the mermaid’s body, membranes, fins on the arms and tail. We outline small scales with wide cross strokes.

- Step 4
We take the shading and carefully shade the pencil shading, where necessary we smooth out the border of light and shadow. Where necessary, we draw a clear boundary between shadow and light. We shade details such as the scales on the tail, fins and fine hairs.

- Step 5
Use a soft eraser to eliminate mistakes made during shading. Then we enhance the shadow with a soft pencil and clarify the details. We finish drawing the shadow on the tail, and draw in more detail the shadow on the hair.

- Step 6
We work with shading again, smoothing out all the shadows. We work very carefully with the face, because the mermaid should be beautiful. We are working on the background, in this picture it is water.

- Step 7
We actively work with a soft pencil, enhancing the shadows. We try to add volume with their help. We carefully draw the hair around the face, while in the background most of the strands should seem to blend into the background. The mermaid is in the water, which means that from below, where it is deeper, the background will be darker, and the darker the background, the more clearly the highlights should be visible.

- Step 8
Using an eraser and shading, we finish the drawing. First we shade the background, then the shadow on the tail, and use an eraser to enhance the highlights. We carefully study the drawing, add accents if necessary, blur the background.

How to learn to draw a river mermaid with a pencil step by step


