Build a summer house with your own hands. Summer house for a summer residence. Sheathing and roofing
If you have recently purchased a summer cottage, then the issue of building a small country house is very relevant for you. You can store household items, expensive tools in it, as well as create a small lounge and kitchen. In this article we will look at how to make construction of a country house inexpensively with your own hands, and also find out which materials you can save a lot on.
Construction of a country house inexpensively with your own hands
Of course, like any construction, it also needs to start with calculating the budget. How much money are you willing to spend on this project? If enough, then you can think about building a brick house. Otherwise, it is recommended to use borrowed frame house technology. The advantages of this method are obvious - saving money, as well as the efficiency of the work performed. In just a couple of weeks your house will be ready for use.

Stages of construction of a country house:
Creating a project. If you do not want to contact a specialized agency, then you can create your own project that will be convenient for you personally. The main thing that you have to do in any case is to show your finished project to professionals in order to avoid possible problems in the future. As for the area of the future home, it all depends on your personal preferences and capabilities. 40 sq.m. is quite enough.
Purchase of building materials. What materials are needed to build a country house with your own hands? Today the market offers a huge variety of high-quality, efficient and durable materials that are suitable for any construction:
- Log or beam. Wood will be needed in any case. Depending on the quality of the raw materials, the cost of the timber will fluctuate. Carefully inspect the material; it is important that it is thoroughly dried.
- Brick or cinder block. They have low cost, durability and reliability. Although building a house using these materials will not greatly affect costs, be prepared to spend a significant amount on subsequent wall finishing.
- SIP panels. High-quality, modern materials that not only save your money, but also time. A house made from SIP panels is warm, dry and comfortable.

Important! If you want to save money on materials, study the market thoroughly. You will be able to find high-quality raw materials at a big discount. You should not focus on branded companies, since they are the ones who mark up more than 50% on the price.

Where to start building a country house on a summer cottage?
The most important element of any country house is the foundation. The service life of the structure, its reliability and strength depend on it. Of course, the foundation should not be neglected, since any mistake or wrong action will immediately result in cracks and splits in the walls. Before digging a trench for the foundation, carefully calculate the weight of future materials - walls, roofing, sheathing, insulation and finishing. All this adds kilograms. Typically, the depth of the foundation of a house should be at least 1 m. After pouring, it must be left for a month to compact and dry.
Immediately after the foundation, you can begin building the frame and installing the roof truss system. It is also worth considering high-quality sewerage. If there is a central sewer system, then you should buy a septic tank with outlets to the irrigation fields.
So, is it possible to build a country house? inexpensively with your own hands? Certainly. The main thing is to plan and not rush to buy materials from the first person you meet.
See also video:
DIY garden cottage
Do-it-yourself summer houses for relaxation

Most summer residents live outside the city only in the summer and do not need expensive permanent homes. They want a roof over their heads and living space large enough to accommodate family members.
How to build a house with your own hands?
An optimal economic pension is best suited for this purpose.
Advantages of summer cottages
 House boards are popular due to the following advantages:
- High level of construction - 2-6 weeks
- Low cost - from 3 to 8 thousand rubles per square meter. m versus 18 thousand rubles. per square meter. m for houses with brick walls
- Low weight, allowing the use of cheap, shallow foundations
- Resistance to freezing forces
- The ability to manufacture parts at the factory, which improves the quality of construction and simplifies assembly
- No shrinkage
- Wide range of architectural solutions
- Ability to warm up and adapt at home for life
Panel house design
 The house consists of a wooden or metal frame covered with panels.
The metal frame is made of a rectangular cross-section, and the wooden frame is made of a rod. For external coatings:
- Lamels
- OSB panels
- Profiled film
- Moisture resistant plates
- Asbestos cement slabs
- toilet
The inner leather is made of moisture-resistant materials.
If the house is to be lived in all year round, the walls are lined with insulation.
Construction of panel houses
Construction companies offer services for the construction of turnkey panel holiday homes or a set of parts for their own construction. The first option frees the builder from most of the problems, while the other allows you to build a house for your dacha and save money.
Project selection
 A quality project is the basis for success in building a house.
Serious companies that produce panel houses and key building kits offer dozens of standard models and offer custom design services.
Individual projects are quite expensive, so they are rarely used for economy-class houses.
Creating a standard project allows you to save on design and a wide selection of already prepared architectural solutions - choose the desired design and location of the house.
foundations
 Under the light panel house, spacers and notches are used with columns and strips and screw pilots.
- Small hidden posts reduce costs and reduce construction time.
Columns are installed at intervals of 1.5 to 3 meters under external walls and columns, at the corners of the building and in places where internal walls connect to external walls. They are made from logs, concrete, red brick, bentonite and base blocks. The depth of the coating is up to 40 cm, the cross-section should exceed the thickness of the walls. To increase stability, the columns are connected to wooden or reinforced concrete beams
- Countertops do not allow for a warm basement.
If the design is included in the design, a shallow, recessed base underlay is applied under the exterior walls, and a foundation base is provided under the interior walls. The depth of coverage and width of the tape are the same as for pillars. The belt is made from concrete, quarries or foundation blocks
- On weak floors it is based on screwdrivers.
Using them allows the house to rest on solid ground that is deeper than the surface. Helicopter bases can be built in 1 to 2 days without the use of heavy equipment
frame
 The panel of a prefabricated house can be made from a kit made in a factory or from purchased materials, in-house or from a contractor.
Turnkey construction of a house eliminates most of the problems for the developer, with the exception of monitoring the execution of construction work - it is impossible to check the quality of the frame assembly on its surface.
To self-assemble the frame from factory parts, you must follow the instructions and wiring diagram included with the kit.
The work resembles a design meeting and is entirely possible for a developer with experience in construction.
The cheapest, but most worrisome option is to build the lumber itself. Depending on the size and number of floors of the house, the frame is made of a rod 100x100 - 150x150 mm or 50 mm thick.
 The frame is installed in the following order:
- At the top of the base there is waterproofing of the roofing material
- For the foundation using built-in parts and anchor bolts to attach the frame (thresholds) - beams, it is located at the edge of the house and under the prairie
- Place logs and give rough soil.
Fits on the edges of the base or beam beam
- Install vertical skeleton posts - first on the corners and then on the walls of the 0.6 m shelf, installed on the cutout, sawn in the bottom panel, securing the clamp and nails and securing the first temporary and then permanent remainder.
At the same time, they constantly control their verticality and position in the same plane. The corner posts are made of sticks and you can use the same 50mm width edge plate for intermediate use
- In the upper places the top tape works. Framed door and window openings
All wooden structures must be impregnated with antiseptic compounds.
Overlapping and covering
Wooden columns are placed on the top frame of the frame and secured using structural clamps.
Width 3-4 meters - plate size 50x150 mm with a large range - 100x150-150x150 mm. The beam is 0.6 m. In this case, 1.8 m wide screens (modules) are used to cover the ceiling.
 Rafting clusters are made on the floor on a panel 50x120-50x150 m.
First install the outer rafts, and then the intermediate elements that control the position of the rafters in one plane. Then make a box and close the roof. Roofing materials for a home should be light, for example:
- Bituminous shingles
- Metal panel
- Profiled film
- Bituminous slate
Wall coverings
The width of the screens should be equal to the degree of installation of the frame rails and the length to the height of the walls.
Security guards are on offer at the workplace in the following order:
- Plates assembled
- On the frame there was a polyethylene film as a vapor barrier
- Guide the inner frame frame
- Frame facing, heater inserted inside
- Wind resistant protective membrane
- Get outer skin
 The coat should be compressed over the frame by half the width of the frame frame to hide them.
The perimeter protective frame is covered with a heater and is tightly inserted between the frame frames. Application is done using nails. When using sheet material, it may be without a frame. The cutting blades are attached directly to the frame and the heater is inserted between the posts.
As can be seen from the description, the construction of a country house with a team of two or three people of average qualification.
Using factory modules significantly speeds up assembly. In just a few weeks after you start installing the frame, you can move into your cottage and enjoy the outdoors.
Videos on weekends
Simple holiday home
How to insulate a plate with your own hands in front of a path
Country houses made of foam blocks: building a house over the summer

Country houses made of foam blocks are lightweight and fireproof.
Thanks to the large dimensions of the blocks and precise dimensions, construction is carried out at high speed. It is quite possible to build a house over the summer.
The use of foam blocks in the construction of various structures guarantees heat conservation and fast pace of work. A country house made of this material will cost more than one made of wood, but less than one made of brick.
What are the benefits of foam blocks?

- They have a precise geometric shape and the dimensions are well maintained.
Therefore, they can be installed quickly
- Moisture resistant
- Inexpensive
- Strength increases over time
- They have very low thermal conductivity.
According to this indicator, it is one of the best materials for construction.
- They have a small specific gravity. Therefore, they are manufactured in fairly large sizes, which has a positive effect on the speed of wall construction.
- Easy to handle
But there are also disadvantages
- Cannot bear heavy loads
- Slowly gaining strength.
In this case, shrinkage occurs.
DIY country house 6x6. Photo report. Part 1
And as a result, cracks may occur.
Use high-quality autoclaved foam concrete - it is less susceptible to shrinkage.
For the construction of one-story country houses, the strength of foam concrete is quite sufficient. In this case, it is necessary to strengthen the upper load-bearing row with reinforcement.
Foundation
Usually, when building a country house, a shallow strip foundation is used.
It can be done in different ways. 
- From prefabricated blocks laid without connection, freely
- Made from blocks, with reinforced belts installed above and below the blocks
- Made from rigidly connected reinforced concrete blocks
- Made from monolithic reinforced concrete
The choice of method is made depending on the properties of the soil.
The reinforced tape option is suitable for both subsidence and highly heaving soils. The width of the tape is made to exceed the thickness of the walls by 10-20 cm. Laying depth is up to 60 cm.
Base – within 40 cm.
On heaving soils, it is necessary to install a cushion made of non-freezing material.
Construction of the foundation
 Stages of making a strip reinforced foundation with shallow depth.
- Marking
- Development of trenches.
If the soil does not crumble, trenches are made the width of the foundation. Their walls will act as formwork
- Filling a 30-centimeter sand and gravel bed in layers, compacting each layer.
The thickness of each layer is 10 cm
- Laying waterproofing material on the bottom and walls of the trench
- Installation of formwork under the above-ground part of the foundation (basement)
- Installation of fittings
- Pouring concrete
Foundation quality conditions
To build a quality foundation, the following conditions must be met. 
- The correct proportions of components in the concrete mixture
- There should be no air bubbles (voids) in the concrete.
To achieve this, use a vibrator or bayonet the concrete with a metal rod.
- There should be no interruptions during filling
After pouring, until the concrete hardens, it requires maintenance. It must be protected from the sun and watered in hot weather. Insulate in cold weather.
Rolled waterproofing material is laid on top of the foundation.
The overlap of stripes must be at least 15 cm.
Wall masonry
Before you start building walls, you need to check the horizontalness of the foundation. The permissible height difference is 3 cm.
If necessary, leveling should be done with cement mortar.
The upper plane of the blocks laid in the wall must be horizontal. That is, not only the edges running along the wall must be horizontal, but also those across them.
Horizontal control is carried out using a level. The position of the block is adjusted if necessary with a rubber hammer.
First row
 The laying of the first row must be done with extreme precision - the accuracy of the construction of the entire house depends on this.
- Find the highest point of the foundation using a level.
The first block is laid in the corner closest to this point
- Then blocks are installed in all other corners
- A mooring cord is stretched between the corner blocks along the outer edge of the wall.
The first row is filled in using it
- If any unevenness in the masonry is formed, they are eliminated with a plane or sanding board. Dirt and dust are removed with a brush
Reinforcement
The reinforcement is laid on foam blocks after filling the first row, and then after laying every fourth row.
A smoothly curved rod is placed in the corners. 
- Using a grinder, grooves of 4x4 cm are made at a distance of at least 6 cm from the edge of the block
- The grooves are cleaned of dust and moistened with water.
- Cement mortar is placed in the groove to half the depth
- A rod moistened with water is laid
- The recess is completely filled with solution
A monolithic belt is made at the floor level.
It connects load-bearing walls along the entire perimeter and gives spatial rigidity to the entire structure.
For laying foam blocks the following can be used: 
- Cement-sand mortar
- Cement-sand mortar with added lime
- Adhesive for wall blocks
The solution with lime does not set so quickly and has good plasticity.
The glue allows you to make thin seams.
It has a fairly liquid consistency and does not set for a long time.
Block cutting
Usually a row cannot be laid using only whole blocks. You have to supplement it with chopped ones.
You can cut blocks with a hand saw. The cutting line is drawn with a pencil on two adjacent sides to ensure an accurate cut. The cut surface is leveled with a sanding board or plane. A smooth surface is necessary to ensure good adhesion between the solution and the block.
Load-bearing walls
 After laying the first row, you need to wait 1-2 hours until the solution sets.
Then the wall masonry continues.
- Corner blocks are laid and leveled
- The mooring is being stretched
- The row is filled with foam blocks
- Irregularities are removed with a plane or sanding board
The ligation sutures should be at least 10 cm.
The minimum length of the outer blocks (corner, opening) is 11.5 cm.
Internal load-bearing walls are connected to external ones by bandaging.
Partitions
- The junction of the partition is indicated on the load-bearing wall
- At this point, flexible connections (anchors) made of stainless steel are inserted into the seam. One end is in the load-bearing wall, the other is in the seam of the partition
- Anchors are secured with nails
Anchors are inserted into the load-bearing wall through a row.
It is allowed not to secure them with nails, but simply press them into the solution.
Door and window openings
 You can buy factory-made lintels for the ceiling, or they can be made from homemade hollow foam blocks, having a P-shaped cross-section.
- Mark the locations of the cuts on the foam block
- Having cut through the grooves, chop off the inner part with a construction hammer
- Hollow blocks in the shape of an inverted letter U are laid over the opening on wooden supports.
These can be boards or beams. The supports can be nailed to the side walls of the opening
- 12-16 mm reinforcement is placed inside the cavity and concrete is poured. The supports remain until the concrete hardens.
You can lay foam blocks over the opening and on metal corners.
Roof
Wooden beams are usually used to construct floors in a foam block house.
The type of roof, its design and shape may vary. Its construction is not much different from this type of work when constructing houses using other building materials.
Exterior decoration
Although foam concrete does not penetrate to a great depth when exposed to moisture, the surface layer absorbs it quite well.
So if the walls are not covered with exterior finishing, they darken and begin to collapse.
 The following can be used as exterior finishing for walls made of foam blocks:
- Hinged cladding installed with a gap (siding, decorative panels, house siding with imitation timber)
- Decorative plaster
- Composite panels
- Natural and artificial stone
- Painting with silicone paints
The construction of a country house from foam blocks is relatively inexpensive, and construction occurs quickly.
If you have some construction skills, it is quite possible to make such a house with your own hands.
Video about how to build a house from foam blocks

When building a house on a summer cottage, everyone wants to build one that will be comfortable to live in.
But coziness and comfort depend on the internal layout of the house. First of all.
And the layout itself depends on the size of the building, the number of people in the family, and the presence of small children. It also depends on whether you plan to live in the country only in the summer, or whether you want to come here all year round. There are some things you should definitely consider when deciding how to layout your home.
Layout of a one-story country house
Even a small house should have at least three rooms:
 The kitchen can be positioned so that the entrance to the house is through it.
In this case, the kitchen room will also serve as a vestibule, which traps cold air if you come to the dacha in winter.
During cooking, the air in the kitchen heats up noticeably, which is also good for heating the house. This option is much better than building a cramped vestibule.
If you want to make a canopy, you can make it out of glass. Using profiles, double glazed windows and glass doors.
If you use your dacha all year round, you need to provide additional heating.
For example, you can plan a country house with a stove in the kitchen, the back wall of which opens into the next room.
This stove will heat two rooms at once. Well, you can install an electric heater in the bedroom. There are many economical modern models.
It should be taken into account that the house heats up much faster if good quality double-glazed windows are installed on the windows. It should be noted that the warmth in the house does not depend on the size of the windows, but on how well they are glazed. The best option is high-quality plastic windows with several panes.
If a country house made of laminated veneer lumber contains one room and a kitchen, then the living room is divided by a partition.
A bed is installed behind the partition. This house is suitable for a family of two.
If there is one more room in the house, albeit a small one, then it is quite possible to arrange a nursery there.
And the dacha will already accommodate a family of four.
These tips are also suitable for those who already have a small garden house. But many people want to increase the number of rooms and are thinking about building a second floor.
Features of the construction of the second floor
Many people think that a great option for increasing living space would be to arrange a second floor.
But you first need to find out how strong the foundation under the house is. It is likely that it will not be able to support the additional weight. You need to find out about this in advance, and not after cracks begin to appear in the walls and the house begins to collapse.
In addition to this, there are some other features. They must be taken into account before building the second floor.
 If there is enough free space on the dacha plot, then it is always better to build a spacious one-story house.
It costs less, and living in a one-story house is more pleasant.
No need to climb stairs. This is especially important if there are elderly people in the house. After all, stairs in two-story dachas are usually steep. They are easier to build than flat ones. In addition, it is much more difficult to heat a two-story house than a one-story house.
If you are building a second floor, there is no need to make concrete floors. It's easier to make them from wood. The house will be warmer. It is best to lift the stairs from the kitchen if it is located immediately outside the front door.
Heat will not escape to the second floor from the living room.
On the second floor there are usually one or two bedrooms. It is best to keep bedrooms small to make them easier to heat. After all, living in a country house, a person enters the bedroom only to sleep.
But, it must be repeated that if the area of the plot allows, then it is better to build a more spacious one-story house instead of the second floor.
Construction of a terrace
 Since people spend almost all their time outside in the summer, a covered terrace needs to be added to the house.
It can be located on the entrance side, then the terrace will also play the role of a porch. It needs to be provided with a good roof that will protect it from bad weather and the hot sun. It is also necessary to provide for the fastening of mosquito nets.
Some tips were given on how to make your country house more comfortable.
10 steps on how to build a country house over the summer
If a person plans to build a dacha from scratch, then he can plan it the way his heart desires. But not everything is as simple as it might seem. Below are the most common mistakes that a person makes when thinking about what kind of house to build on his summer cottage.
Of course, everyone’s tastes differ, but still, we will talk about those things that help reduce construction costs and increase comfort.
Mistakes when planning a country house
The house is too big
There is no need to build a house too big.
Thick walls in the house
Walls that are too thick require a more powerful foundation, and therefore extra costs.
Modern technologies make it possible to build lightweight houses, for example, frame houses, or from timber. Good insulation solves all heating difficulties, and the choice of high-quality material and qualified builders makes the house very durable.
Construction of a basement or ground floor
There is no need to create a large basement or basement floor unnecessarily.
These premises require high-quality waterproofing, insulation, ventilation and heating. For all this you need to hire specialists. Additional costs for building materials are required. Very significant. Also, do not build a base that is too high. This also increases costs.
If you plan to build a fireplace in the house, then you need to build it in the middle so that the heat from it spreads to adjacent rooms.
A fireplace built against an outer wall is completely irrational.
It seems that all things are very simple. But if you avoid these mistakes when planning your house, you can significantly save on building materials and construction time.
Video example of planning a country house using a special program
Posted on: 4-2-2016

For summer residents who are just going to build their first small house, my selection of 15 photos of country house design ideas will be very helpful. I must say, there is something to learn here and something to be surprised by, but what can I say - it’s better to see for yourself!
I draw your attention to the fact that there are no diagrams or plans here.
All material is provided for inspiration only. But, an experienced builder, if you show him a picture of a structure you like, he can easily build, if not exactly the same, then close to the original.
The first house simply captivated me with its canopy with a pointed roof. If it weren’t for this roof shape, it would have been just an ordinary country house! Agree, such a canopy roof, supported by slender wooden columns, gave the whole house sophistication and elegance!
A beautiful country house, to say the least!

And in this miniature house I really liked the turret at the very top. In terms of area, it is like a temporary shed, but the beautiful decoration of the walls, windows, tiles on the roof and this turret make it almost a palace!
By the way, flower boxes mounted under the window greatly improve the appearance of the facade, no matter how small it is!

This house is just very cute, especially the lattice windows and door.

This country house caused a storm of delight among my whole family.
I showed it to them, saying that we would build the same one for ourselves at the dacha. And a miniature terrace, and dormer windows on the roof! Just a peek. A miniature copy of a beautiful country mansion!

There is a lot of light in this house.
Choosing a garden house and its phased construction
because it has very large windows. But even in cloudy weather it is light and gives you a feeling of greater unity with nature! The pediment of this house is designed in an unusual way - it is decorated with two balusters.

And in this house there is a second light under the roof. Since there are no windows on one side, something like dormer windows are made under the roof itself.
True, from the photo it is clear that the owners use it as a workshop, but for newly-minted summer residents it could also serve as a shelter at night and from the rain.

A small wooden house with a canopy across the entire width of the roof.
A good solution - here you have a patio terrace, the wall of the house will protect you from the wind, and the roof canopy will protect you from rain and sun.

This little white house is just a fairy tale!
Elegant, romantic, with a pergola attached to it, it invites you to settle in and not know any grief! Still, white color adds sophistication to any building, even a very small one.

This interesting asymmetrical house has a frame structure and is lined with wood.
The originality of this building lies not only in its unusual roof, but also in the glazing of two walls, forming a “transparent corner” at the exit.

This house is simply attractive and well built.

The blue house under a tiled roof with white curtains looks very attractive.
It feels like the house has a caring owner!

And this bright house in front of a small pond made me feel tender. It is so small and so harmonious with its blue door and windows with tulle curtains that I wanted to sit down in front of it, dip my feet in the pond and daydream for an hour or two.

This house is made of wood, although it is low, it is very nice.

Well, the last house in the series of 15 best is a house with a trapezoidal canopy.
Beautiful, elegant, tastefully decorated - what else can you say! And there is a terrace next to it - there is a place to admire the stars in the evening!
Ideas for small cozy country houses

We could stop here, but there are so many ideas for small houses that I always want to look for something and share my finds with you.
Let me remind you that in America and Canada, the hobby of designing and creating houses on wheels of unusual shapes is very common. These are real residential buildings. I will continue to introduce you to interesting ideas for such houses. After all, if we exclude the wheels, then such houses will look great on our plots! Here is an overview video from the creators of this wonderful house.
There is no translation, but everything is clear.
My construction and life in the country
I would like to tell my story when we decided to live in the country and start all over again. In general, it so happened that our apartments did not exist, and in recent years we lived in rented apartments. And so life within the walls of others and frequent trips brought us - I wanted my own, peace and stability. But the way we live is not rich and can't buy anything, you decide to buy a Dacha (4sotki) and then another, we left the pages very cheap.
These sites are the same, we prepared that they were forced to leave all the bushes and trees from their homes, and yet they had the resources that I introduced sandstone and sand into the future of our home.
But after a few days we decided to give them a chance to defeat the house in the village, and then I brought the plate and two evenings (as I worked during the day), the house was almost ready. It looked like a trailer, but we were not aware of the beauty, it was already the end of September and cold and winter would soon be upon us. Below is a photo of creating a time zone
Construction of a cottage in the country - the beginning
 He built it twice - he wanted it faster, but it got dark early, so he took a battery and a lamp with him. So, this house was looking for another night - it was not yet dark.
It worked like a screwdriver and wire, the design was very simple, so everything was done very quickly.
Cabin construction in the country
 I then brought in some foam and the house was insulated with 10cm thick foam and foam sealed all the seams between the foam and all the openings.
He made the front door. And the interior, while there were bare slab walls. The next day he brought 200 pieces. red brick and it took two nights to build the brick. A photograph of the furnace design has not survived.
Construction of holiday homes
 House dimensions 6.3 * 3m.
interior space 6*2.7, common living room 16.2 square meters, which had to accommodate four adults (me, mom and my two sisters) in the country, electricity, and this is what I thought about in advance. I made a wind generator, I installed a small battery and bought a 12/220 volt converter. The power of such a power plant was very small, because the wind turbine was small and was an irregular dean, also very low. But sometimes one energy-saving light bulb is enough.
All in all, it was a painful start, but a week into this construction, we moved into this period. The transfer took place on October 2, the same day as my sister’s birthday.
In the fall the woods were ready for the winter and a porch was added to the house.
The house is insulated externally with a vapor barrier, covered with film and internal shiny insulation. As a result, in the first winter we found out.
Winter in the country
 In winter we were already at home with wind power for every 150 watts, there was enough electricity for lights and sometimes on TV, just as the wind was very weak and there was not enough battery power, but I saved everything for improvement, including the power plant.
I described everything about the plant in the section “My little adventures”,
Therefore, winter lived in such spartan conditions. My sister and I worked, paid in the spring, having accepted a loan 3 years ago, and at the beginning of the summer a new loan appeared, which spent the money on small items and bought a Chinese engine (110ss) to execute a tree, I went to him for a trailer trailer.
We bought a chain saw and two solar panels. up to 100 watts, so they were buying new batteries for the power plant until March.
In the summer, the porch was covered with luminous insulation to keep it cool in the sun, and solar panels were installed on the wall.
Even the lights on the street and in the house repeated the wiring.
Solar panels
 In the summer, the wood was prepared for the entire year, and the motorcycle made 35 trips from nearby forest stands.
So I bought corrugated cardboard, wood, cement, and I put a new corrugated panel fence on the front.
Wood collection
 At the same time, I poured a concrete pad under the base of the future of our house.
There was no swimming under the foundation, it simply grew and leveled the surface and spilled a 40 cm wide strip around the perimeter of the house.
How to build a house in Dachau: characteristics and construction phases
The thickness of the concrete is 10-15 cm. Below the photo are parts of the concrete. This is how we lived in the fall, photo after the rain, there was a bit of a mess outside as I searched and twisted the jars under the winter potatoes.
Life in the country

Life in the country
 In addition, 11 meters were excavated in Dachau, I dug it myself, I was in a hurry for almost a month and poured concrete with concrete, but I finished it.
So, the tile broke through. He dug a basement on the site of the future house, filled the basement with concrete, and then made a hatch into the roof. Small details were done on details, but I will not list all the little things, only the important ones. I wrote about the break here - Well, with my job 2.
Fine
 This year, at the beginning of spring, I took 7 plate cubes, bought ruins and cement and started with the main overflow.
The bottom part of the photo is the preparation of the irrigation panels. Last year the center of the concrete base under the furnace was flooded.
Foundation formwork
 After installing the panel panels around the perimeter, he reinforced with a 10mm cast in two threads.
Then I invested in concrete and ended up like this.
Filling the foundation
 The panel was attached with 6mm hex pins and once ejected it was easy to remove and remove the shell.
Filling the foundation
 Then build the wall frame. The dimensions of the house are 6.30 * 10.80 m. The skeleton was placed alone, sometimes the truth helped the sister give or save something. All this has turned him into screws that pull themselves. bottom and top, then he used a homemade galvanized sheet metal plate.

DIY decorated house

DIY decorated house

DIY decorated house

DIY decorated house
 Currently, the money for further construction has been completed.
Now you need to make money from corrugated cardboard and place a frame around the roof.
Continuation - second part of the frame
Good day, dear users of the site. The warm season is approaching and we cannot sit at home. Either gardening work or cleaning the garden plot. And you never know what worries you have on your plot in a village, town or country house. Sometimes, after righteous labors, you just want to sit down and relax, drink tea or coffee, listen to music, and so on. In your yard, you can simply take out chairs and sit, or it is better to build a structure specially equipped for relaxation. Therefore, I would like to present to your attention another summer guest house. This building is ideal for a summer holiday, and even in the cold season, if you install a stove in it, it will be quite cozy. The assembly process is quite simple and will not be difficult for those whose hands grow from the right place.
To begin with, the author of this building prepared a place for the construction of the structure. I started, as usual in such cases, from the foundation. The author made a columnar foundation. Each column required eight foundation blocks. This is what the finished foundation looks like. Easy to build and not very expensive. Bricks can be used instead of foundation blocks.

The author's next step is tying, i.e. erection of the foundation of a future structure on the foundation. For this, the author used a beam with a section of 150x150 mm. Before installation, treat the timber with fire protection.

After we have tied the foundation, we install more between the main bars. This is for the floor. Next, the author begins to lay the floor itself.


Please note that when making the floor, the author does not place it in the front part of the building, since there will subsequently be a small terrace with a porch there. The author decided to insulate it immediately, without erecting walls. For this I used Izospan B, 5 cm insulation.

Further, after the author has covered the “sub-floor” with insulation, he lays the main floor on top of it.

Next, the wall frame is assembled and installed on the base.


Next, the author installs ready-made doors, upholsters the frame of the walls on the outside with isospan and trims everything with imitation timber.

This is what the walls look like from the inside at this stage of construction.

The next step is preparing the roof. The author puts insulation and sews everything up with boards.

After the author has prepared the ceiling, he assembles and installs skates on the roof. He fastens them with construction corners.


Next, boards are nailed for subsequent installation of insulation and roof tiles on them.

After all the boards are filled, we insulate the roof on top with isospan-D

Now the author begins to insulate the interior of the future guest house. For this, materials such as Izospan A, insulation, and lining are used.
A country house can only be the first stage of a new life surrounded by nature. Behind it it is quite possible to master the construction of a large cottage. A one-story frame country house is the best option for those who want to have convenient and comfortable economy-class housing, built with their own hands. Such a structure can be erected in just one season.
Foundation for a summer residence
The boards are securely attached to the roof frame and to the roof ridge. The distance between them can reach one meter.
The crossbars, in a checkerboard pattern, attach the ramp boards. The crossbars are located half a meter apart from each other.
Sheathing
The outside of the house is sheathed, with panels or - at the choice and taste of the owner.
Self-construction of country frame houses is an inexpensive, rewarding and extremely rewarding activity. Preliminary calculations and planning of upcoming work greatly facilitate the construction process, reducing the possibility of errors to a minimum.
Nowadays, most people want to live outdoors during the warmer months. Breathing clean air, temporarily getting rid of the atmosphere of a noisy, smoky metropolis and constant stress is the dream of many city dwellers. Some spend years collecting the required amount to build a permanent house in their country house. But in order to move to nature, you don’t have to wait until you have the required amount of money. A garden house can be a comfortable temporary home; it won’t take much time to build, it won’t cost much, and it will be very pleasant to live in it in the summer. It’s realistic to build a garden house with your own hands; you need to choose a suitable project, material, and decide on the price.
A budget version of a garden house can be built from timber or using Finnish frame-panel technology. These are buildings of the same type, only when building a log house it is sheathed with timber (profiled or simple), and a frame house is sheathed with chipboard, plywood or fiberboard.
Garden houses using Finnish technology are a good solution for a summer cottage. A lightweight structure does not require a massive foundation; the frame is quickly sheathed with finishing material.
It takes less time to build such a house than a timber house, because large sheets of plywood, which are used for sheathing, are attached to the frame much faster than beams. Such a house can be erected even in a week, and it will look presentable, especially if you use wooden clapboard for cladding.
A beautiful garden house made of plywood - decorative chimney trim, brightly painted walls, an openwork porch and a roof made of bitumen tiles. A house can look aesthetically pleasing without wood paneling

Construction stages:
- Installation of foundation supports.
- Construction of the frame: work on the upper and lower cladding, erection of vertical supports and rafters. For the installation of doors and windows, contours are formed using additional beams.
- To create a rough version of the floor, thick boards are used - 20 cm thick or more.
- The outer cladding of the frame is made of plywood; self-tapping screws are used for fastening. For interior cladding, plasterboard, plywood, fiberboard or chipboard are used. Nights in spring and even summer can sometimes be quite cool, so it is advisable to insulate the house. To do this, a layer of mineral wool insulation can be laid between the layers of sheathing.
- Installation of a clean floor - floorboard or linoleum.
- Plywood covering of rafters. The plywood is then covered with a layer of drying oil and roofing felt.
For your house to be beautiful, it requires exterior cladding made of solid material. For example, siding or wooden lining. Windows in a country house can be installed either plastic or wooden, it’s a matter of taste. But plastic is easier to maintain, and such windows will last longer.
You can build a garden house with your own hands from timber. This is the most commonly used material for country houses. The timber looks aesthetically pleasing, and a building made from this material can last quite a long time. In construction, you can use simple and profiled timber. In the latter case, assembling the house resembles a construction set, because the connection of the elements occurs thanks to the tongue-and-groove system. Today, many companies offer country houses made of profiled timber; all the elements of such a house are already ready, they just need to be assembled.
Construction of a garden house from timber
First of all, as usual, we make the foundation. It can be either columnar or ribbon. A columnar foundation is suitable if the size of the house is small. You can also use concrete slabs for the foundation; they are laid on a well-compacted layer of sand, buried about 15 centimeters into the ground. After erecting the foundation, a waterproofing layer should be laid on it; roofing felt will do.
After the foundation is made, the frame is installed. The crown and logs (bottom frame made of timber) are laid on the foundation supports, then vertical supports made of the same material are installed.

The frame of a garden house made of timber can be erected in a short time, while the construction is quite strong and durable
If you like a garden house with a veranda, the lower joists are extended to its intended length, installed on additional supports. To create the floor, thick boards are used, as in the option described above.
After installing the floor, we assemble the walls from timber. Dowels are used to fasten the connections; after a layer of sealant, a new crown is laid out on the finished row. A sealant is required for each layer; you can use jute or tow.
Then we arrange the roof. Installation of braces and rafters from timber. The next stage is sheathing with timber and laying a layer of roofing material. After this - final work on the floor. The plank floor is covered with thermal insulation (mineral wool layer). Glassine can be used as a hydro- and vapor barrier. Thick linoleum or floorboards are suitable as flooring in a country house.
The house will look very attractive if the outside has beams or wooden clapboards. Now you can move on to installing windows and doors and think about how you want the interior of your country home to look.
Interior design of a garden building
The interior of a garden house made of timber is good in itself - the walls and floors covered with wood look excellent, so the design of the garden house inside can be made in the style of minimalism - the necessary furniture, a minimum of accessories, the general background is wooden paneling.
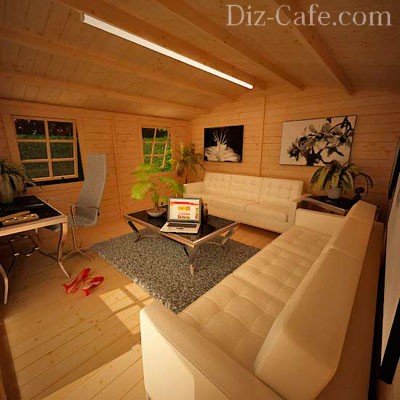
Interior of a garden house in a minimalist style. Walls, floor and ceiling - wooden paneling, minimal furniture and decor in the form of green plants and a couple of paintings
Wood goes well with natural stone, so you can make a tabletop from sandstone or lay out part of the wall. On the veranda, in combination with wood, forging elements will look harmonious.

The veranda of a garden house made of timber, where wood, forged lamps and natural stone are perfectly combined, which is used to line the wall, table and brazier
The rustic style is also suitable for the design of a garden house inside - use patchwork, checkered fabrics and curtains, pottery, rough wooden furniture, dried bouquets if you like the country style.
Material about country style in the country will also be useful:
If the inside of the house is lined with plywood or plasterboard, the home can be given an urban look by covering the walls with wallpaper or painting, and covering the floor with carpet.

Interior of a garden house in urban style, 2 in 1, bedroom and office
Examples of garden house layouts
The plan of a garden house should be simple - this is the construction of a small area, usually with one, maximum two living rooms, a kitchen, a small bathroom, an entrance hall/storage room and a veranda, if provided for in the layout.
People acquire dachas in different ways - they inherit them, buy plots with a house and remodel or complete them for themselves, or buy land in an almost open field and begin to develop virgin lands. One of our craftsmen, who decided to join country life, was puzzled by just such a process. And since the most effective way to save money is to do it yourself, that’s exactly what he did, starting small - with a summer house in the country “for the first time.”
- Country house 6x6 with built-in terrace 4x3:
- project;
- foundation;
- water supply;
- box;
- internal work.
Country house 6x6 with built-in terrace 4x3
Gonzik1
Last year I purchased a plot of land in a field (like a new holiday village). The poles were installed, electricity was supplied to the site (it took two months to complete the paperwork), a panel was installed on the pole with a meter, a machine and an outlet. This year, having saved up some money, I began construction. I decided to do everything myself, because it’s cheaper and more reliable.
DIY country house project
The craftsman created the dacha construction project with his own hands over the winter; according to his idea, this is the first module, to which he will later attach another one, combining both parts into a solid structure. Using a special program, I made a drawing that allowed me to accurately calculate the required amount of building materials.


Foundation
Since the house is lightweight, using frame technology and on one floor, Gonzik1 gave preference to a columnar foundation made of special concrete blocks (20x20x40 cm). His choice was also influenced by the low groundwater level (GWL) at the dacha and the excellent condition of similar foundations under neighboring buildings. Depending on the level, I used one or two blocks per pillar - removed the fertile layer, added a sand cushion, and laid the blocks. The plane was maintained using a hydraulic level. According to the craftsman, he appreciated this simple tool - it’s cheap and the measurement accuracy is excellent. The pillars were covered with roofing felt for waterproofing. With the help of relatives, the foundation was ready in three days.

Water supply
There is no place for a central water supply in the field, so the problem of water supply is a personal matter for each summer resident. Our craftsman initially planned to drill a well. Test drilling at thirty-six meters was unsuccessful - dense black clay came out instead of water. The drillers reported that only an artesian well about ninety meters long would help, and they announced an exorbitant price. Gonzik1 I got upset, imagining the scale of the problem, and decided to dig a well, as the foreseeable future has shown - the decision is the right one. Three days of work, ten rings - a column of water for one and a half rings, restored in an hour and a half.
Box
The strapping is two-layer - at the bottom there is a board 100x50 mm, at the top - 100x40 mm, impregnated with fire and biological protection, the strapping elements were connected to each other with nails (100 and 120 mm). The strapping was laid on top of the roofing felt and secured to the posts with anchors.

All frame posts were also assembled from 100x40 mm boards with nails; the walls were raised directly on site using temporary jibs. They collected only the ridge on the ground, then lifted it onto the roof. This stage took another four days.


The next thing was to install the rafters, wind boards, install the wind protection, and put the counter batten and sheathing on top. Our craftsman chose metal tiles as the roofing covering.

Gonzik1
I read that no matter which side the sheets are laid on, they are often laid from left to right. It turned out, no, the tiles are laid from right to left, otherwise the next sheet will have to be placed under the previous one, which is extremely inconvenient, especially when installing alone. The weather was not very good, it was drizzling, there was wind, it moved along the roof like a cat, trying to cling to the sheathing with its feet. All twelve sheets of tiles (115x350 cm) were laid in half a day.


After the tiles, we got to the grounding, due to which the floor joists were not completely laid. Gonzik1 I used a corner 50x50x4 mm, a connection from a metal strip 40x4 mm, plus a piece of self-supporting insulated wire (SIP).


Next, we covered the entire structure with a protective membrane, installed a door, laid floorboards on the terrace, and began covering the façade with imitation timber. The cash was immediately treated with protective impregnation. During the work, the craftsman made adjustments to the project - he made a third window, so there will be more light, and the view from the window is attractive.


Interior work
With the end of the holidays, the construction process slowed down as much as possible, since free weekends did not occur every week, but it continued. I finished with the floor - rough on OSB joists, a windproof membrane on top, stone wool slabs between the joists, sheathing, and then OSB again on it. Linoleum is assumed to be the finishing coating. The house also got another window.


I brought electricity into the house, insulated the perimeter with stone wool, a vapor barrier on top and clapboard as cladding.


The finishing process continued according to the same algorithm; contrasting trim on the window openings added decorative value to the house. All internal walls will be covered with clapboard.

Gonzik1
There are no stoves planned, the house is for seasonal use - spring, summer, autumn. I plan to install electric convectors, I have no problems with electricity there, three phases, new substation, 15 kW per site.
For all those interested, the craftsman posted a calculation of materials (all used boards are 6 meters long):
- foundation blocks 200×200×400 mm, 30 pieces;
- board 50x100 mm, 8 pieces (for the bottom layer of strapping);
- board 40x100 mm, 96 pieces - approximately 8 pieces left;
- board 25x10 mm, 128 pieces - approximately 12 pieces left;
- timber 100×100 mm, 3 pieces;
- rail 25×50 mm, 15 pieces;
- imitation timber 18.5×146, 100 pieces – approximately 15 pieces left;
- insulation, stone wool 1200×600×100 mm, 28 packages (6 slabs each) – package left;
- windproof membrane 1.6 m wide, 60 m² per roll, 3 rolls;
- vapor barrier 1.6 m wide, 60 m² per roll, 3 rolls - approximately 0.5 rolls left;
- OSB 3 2500×1200×9 mm, 15 pieces (rough and finishing floor) – approximately 1.5 slabs left;
- metal tile 350×115 cm, 12 sheets;
- lining 12.5x96 cm, 370 pieces (10 packs) - not sure it’s enough, partially used for toilet hemming, and the walls are not finished yet;
- wooden windows 1000×1000 mm, 3 pieces;
- entrance metal door 2050×900 mm, 1 piece;
- protective impregnation for wood, 10 liters - 3 liters left, but the house is covered in only one layer.
Taking into account independent construction and finishing, the estimate turned out to be quite budgetary.

Gonzik1
- Foundation - 2500 rubles.
- Boards for the frame, wind protection, vapor barrier, imitation timber (exterior decoration), lining (interior decoration), insulation, etc. - 110,000 rubles.
- Metal tiles - 20,000 rubles.
- Door - 13,200 rubles.
- Windows - 4,200 rubles x 3 = 12,600 rubles.
- Forwarding SIP to the house - 3000 rubles (with the cable itself).
- Impregnation - 3600 rubles.
I’m still planning to install electrical wiring around the house, I think I’ll spend 8-10 thousand. I don’t give the cost of nails, screws, staples for a stapler, etc., etc., because I no longer remember how much I purchased. Total: about 165,000 rubles.
For another short but fruitful vacation - I finished the electrical work, finished the interior paneling and painting, made a set for the kitchen, completed the terrace. I laid a 100x40 mm board on the terrace, took it unplaned, processed it with an electric planer, and then covered it with impregnation in two layers. Over the past winter, everything was in place, nothing moved, did not dry out or warp. The craftsman has plans to complete the second block, but this test of the pen is excellent - an excellent summer house for a family holiday.


