Drawing leaf fall in pencil step by step. How to draw leaves. Topic: Drawing an autumn forest
In the previous lesson I showed . This lesson will be like an addition to it. Here we will look at how to draw leaves with a pencil step by step. As an example I will show how to draw Maple Leaf . The drawing process is not complicated.
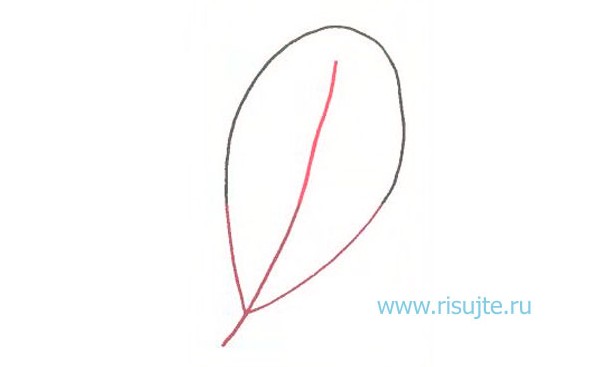
Step one. I start with the markup. I draw something similar in appearance to a hieroglyph. Each of these lines represents the main network of veins.  Step two. Let's draw the contours of the maple leaf itself. Remember that this is still a sketch, so there is no need to press on the pencil. We'll erase these lines later.
  Step three. Take a colored pencil. I leave the choice of color up to you. I took green, even though it’s already autumn, but I like green. We outline the contours and erase the auxiliary lines that I talked about in the previous steps.
  Step four. Take another colored pencil and color our sheet as you wish. Mine turned out completely green. But you can make it in any color. There are many different types of leaves in nature, so there are no restrictions. The result will look something like this: But this is not the end. This time I decided to show how to draw leaves with a pencil completely, from sketch to coloring, and not just coloring as in the previous lesson about autumn. It turned out very realistic, what do you think?
I’ll also give you a cheat sheet (or just remind you what they look like) the leaves of other trees. The collection was assembled personally. My classmate and I walked through the park and picked some leaves for ourselves. This is how we have fun:  I also really wanted to draw chestnut leaves, but I didn’t find a single good copy, they had all fallen off. Therefore, I give a picture from the network:
  And here is the entire harvest:
  That's probably all. You can also draw other vegetation.
Drawing is fun and useful activity, which not only develops your artistic taste, fine motor skills and logical thinking. Creation even simple drawing trains memory, increases attentiveness and develops imagination.
Autumn time pleases us not only with a rich harvest, but with a riot of colors. The bright decorations that “dress” the trees will leave few people indifferent. Colorful images of autumn foliage will help you preserve a bit of autumn on a winter day. How to create them?
Drawing autumn leaves: maple
To obtain an image of a maple leaf, you can use several techniques.
Scheme 1
- Draw an oval.
- Draw a vertical line dividing the image in half (line A).
- On each half, lay 3 vein lines, dividing each sector into 4 unequal parts. All lines originate from one point located in the lower third of line A.
- Using chaotic teeth, you connect the intersection points of the lines and the oval.
- Turn the lower third of line A into the base of the sheet.
Scheme 2
- You begin the work by drawing the veins of the leaf - a central line and 2 side lines coming out of it.
- Then move on to a contour in the form of a jagged line, which you lay at a short distance from the veins.
- Add smaller details.


Scheme 3
- Draw a square with emphasis on one of the vertices.
- Use a vertical line to divide it in half. Continue the line a little down beyond the square.
- On each half you depict 3 veins.
- Draw soft teeth around each of the veins.


Drawing autumn leaves: oak
Scheme 1
- You start with an oval image, narrowed on one side.
- Draw a winding vein line through the middle of the oval, and smaller strokes from it.
- Use a wavy line to mark the edges of the sheet (within the oval).
- Remove the excess outline.

Scheme 2
- Draw the outline of the leaf in the form of an elongated hexagon.
- Divide it in half and draw smaller veins from the middle line (3 - 4 on each side).
- Form a wavy outline around them.

Drawing autumn leaves: linden
The linden leaf is one of the simplest graphic images.
- Draw a vertical, but with a slight slope, line - the central vein.
- Make 2–3 strokes from it on both sides. Even smaller veins can be drawn from them.
- Draw the outline of the leaf in the form of a rounded triangle. At the place where the tail is attached, draw the outline of the sheet in the form of 2 converging arcs.


Unusual techniques for drawing autumn leaves
Stencil
- Place an autumn leaf on the work surface.
- Place a sheet of paper on top of it.
- Pressing the paper tightly, lightly stroke the surface of the sheet with a wax crayon.
- You will see how not only the contours of the leaf appear on the paper, but also all its veins.


Leaf Seal
If you are bored with working with a pencil and want to learn new techniques for creating autumn motifs, prepare foliage and paints. It is best to work with gouache, but if you don’t have it, watercolor is also suitable for these purposes.
- Apply paint to the sheet, paying special attention to the veins. Use multiple colors to create brighter, more whimsical patterns.
- Turn the sheet over and make an imprint on the paper.
If the leaves are large enough, you can get not only colorful foliage, but entire trees.


As you can see, drawing leaves is quite simple. A little patience and skill and autumn colors burst into bright fireworks.
Summary: DIY autumn crafts for children. Autumn drawings. How to draw autumn. Autumn leaves. Drawings autumn trees. Paintings on the theme of autumn.
What is the most remarkable thing in autumn? Certainly, autumn leaves! In autumn, the leaves are not green, like in summer, but bright, multi-colored. Leaves on trees, bushes, fallen and lying on roads, on paths, on grass... Yellow, red, orange... At this time of year, even if you are not a photographer or an artist, you just want to pick up a camera or a brush with colors to capture this wonderful time of year in all its glory. We will help you with this. In the second part of the article “Autumn Crafts for Kids: How to Draw Autumn,” we will teach you how to draw autumn leaves in different ways.
Autumn drawings. Drawing autumn
Under a sheet of regular printer paper, place the sheet with the veins facing up, then shade it with a wax crayon placed flat. You will see how the design of a leaf with all the smallest veins appears on the paper.

To add a little magic, you just need to take a white crayon and run it over the white paper, and then let your child paint the paper with a sponge. See link >>>>

By the way, there is interesting way coloring using colored corrugated paper. You must first draw leaves on paper in exactly the same way with white wax crayon. After this, tear corrugated paper of autumn colors (red, yellow, orange, brown) into small pieces and, thoroughly wetting each piece in water, stick them onto the drawing. Make sure that there are no two pieces of paper of the same color next to each other. Let the paper dry a little (but not completely!), and then remove it from the drawing. You will get a wonderful multi-colored background. Leave the work to dry completely, then put it under the press.


You can make an interesting autumn craft if you place the leaf under thin foil. The foil should be placed with the shiny side up. After this, you need to carefully smooth the foil with your fingertips so that the design appears. Next you need to cover it with a layer of black paint (this can be gouache, ink, tempera). Once the paint is dry, very gently scrub the painting with a steel wool pad. The protruding veins of the leaf will shine, and dark paint will remain in the recesses. Now you can paste the resulting relief onto a sheet of colored cardboard.

Autumn leaves. How to draw autumn
A very simple and at the same time effective technique is to print leaves on paper, onto which paint is first applied. You can use any paint, just apply it to the side of the leaves where the veins appear.

Here are prints of rowan leaves. And any kid can draw rowan berries - they are made using cotton swab with red paint.

Beautiful autumn drawing It will work if you print leaves with white paint on a sheet of dark-colored cardboard. When the paint dries, you need to color the leaves with colored pencils. It will turn out beautiful if some leaves are left white.


The background can be left as is, or made colorful by painting with paints using a sponge. In this case, you need to leave a small unpainted space around the leaves.


If you decide to make the background colored, then the leaves themselves can be left white.

How to draw autumn leaves. Autumn crafts
To add volume to your drawings, you can use the following interesting technique. You will need thin wrapping paper or white crepe paper.

1. Tear it into pieces irregular shape and glue it onto a thick sheet of paper using PVA glue. Try to get more “folds” and “wrinkles”; they will later give the drawing texture and volume.
2. When the glue dries, using a stencil, draw and cut out three maple leaves (large, medium and small) from this paper.
3. Paint them with colors in autumn colors, then stick them on a sheet of black cardboard.
More detailed instructions with photos see the link >>>>
DIY autumn crafts


Another original autumn pattern, made in warm and cold colors. The leaves themselves are drawn in warm colors (yellow, red, orange), the background is in cold colors (green, blue, purple). To do this job you will need a compass.

1. Draw some leaves different shapes on paper. 2. Now, using a compass, draw a circle of small radius in the lower left corner of the piece of paper. Next, adding about 1 cm at a time, draw circles of larger and larger radius, as far as the compass allows. 3. Now do the same in the upper right corner. 4. Finally, color the autumn leaves with felt-tip pens or pencils in warm colors (the colors should alternate sequentially), and the background in cool colors.
Maple Leaf. Maple leaf drawing
Help your child draw a maple leaf on a piece of paper. Divide it into sectors with veins. Let the child paint each sector of the leaf with some special pattern.


You can combine two methods.


Autumn crafts for children
Another unusual autumn pattern.

1. Draw leaves of different shapes on paper. They should occupy the entire sheet of paper, but not touch each other. Some of the leaves should start from the borders of the sheet of paper. Draw only the outlines of the leaves, without veins. 2. Now using a simple pencil and rulers, draw two lines from left to right and two from top to bottom. The lines should cross the leaves, dividing them into sectors. 3. Choose two colors for the background and two colors for the leaves. Color them in the chosen colors as in the picture. 4. When the paint has dried, trace the outlines of the leaves and the drawn lines with a gold marker.
Drawings on the theme of autumn
To make this autumn crafts you will need regular newspaper and paints (including white paint).
1. Draw a maple leaf on a piece of newspaper.

2. Paint it and, after the paint has dried, cut it out.


3. Take another sheet of newspaper and use white paint to draw and color a large square on it.

4. Place your sheet over the paint and wait for it to dry completely.

5. This is what you should get in the end!

DIY autumn crafts
Method 10.

Autumn drawings. Drawing autumn
Method 11.
In the article “Do it yourself Easter cards” we talked about an interesting drawing technique using wax crayons. See link >>>>
This method can also be used to draw autumn leaves.

And here, in a similar way, autumn leaves are painted with colors.


Concluding our review article on the topic “How to draw autumn leaves,” we’ll tell you about two more methods.
Autumn crafts for children
Method 12.
Lay the leaves on the paper, then use an old toothbrush or flower sprayer to spray paint. In order not to stain everything around, you can do the above procedure in the bath.


How to draw autumn leaves
Method 13.
And finally - stamps of leaves using a roll of toilet paper. This is a great way to make gift wrapping with your kids.


Material prepared by: Anna Ponomarenko
Other publications on the topic of this article:
If you have no imagination or want to plunge a little into the autumn magic, spend time with your child drawing a maple leaf. This interesting activity with many bright colors and a positive charge of emotions.
The maple leaf is one of the most beautiful. Besides what he has original form with five pointed ends, its color is very bright and colorful. It doesn’t matter for what purpose you need to draw this drawing, for children's competition or autumn landscape, This a useful pastime for anyone.
Drawing a maple leaf is easy. They will help you with this step by step sketches:
- First of all, you should draw the frame of the leaf. To do this, you need to draw an arched vertical line - this is the stem of the leaf.
- Then draw two horizontal crossing lines by hand. This is the basis for its five-pointed shape.
- Trace the ends of the drawn lines, and then erase the sketch inside the drawing. The base is ready!
After that, start detailing your drawing. It is necessary to make sharp tips along the edges of the leaf to make it look realistic.
 Detailing the drawing
 After this, erase the extra lines of the sketch and draw characteristic veins on the leaf.
 Veins on a maple leaf
 After that, all you have to do is paint the sheet in colorful colors: yellow, orange, brick, brown, red, green. The sheet can be plain or have many shades.
 Maple leaf coloring option
 Image and outline of a maple leaf, template
If you don't have the artistic skills, time, or even desire to painstakingly draw a maple leaf, you may template will come in handy. This template can be circle on clean slate paper and then color it to your liking. This is how you get neat and beautiful drawing.
Templates for drawing a maple leaf:

 Maple leaf, template. Option #1
 Maple leaf, template. Option No. 2
  Maple leaf, template. Option No. 3
 Maple leaf, template. Option No. 4
 Autumn maple leaf: drawings for children
You can get ideas for creativity and draw a maple leaf (one or a whole bouquet) with your child by studying ready-made works.
Drawings for children with maple leaves:

 Realistic drawing maple leaf
 Children's drawing: Maple Leaf
 Colorful maple leaf: drawing
 Maple and maple leaf: drawing
 Beautiful maple leaf: drawing
 Tree leaves are perhaps the most beautiful of natural decorations. That is why leaves can often be seen in paintings of the most different artists– from beginners to professionals. If you don’t yet know how to draw leaves, this article is for you.
Don't be confused by the fact that the photo shows only one oak leaf. Having learned to draw it, you can easily draw any other leaves - the main thing is to correctly understand the principle.
How to draw leaves quickly and easily
To begin, draw the outline of the leaf. To do this, approximately in the middle of the paper sheet, draw a vertical strip, slightly curved - this will be the middle. And add a drop-shaped detail to it. This is the basis of the future oak leaf.
Now it's time to turn this sketch into a more detailed drawing. To do this, right inside the drop-shaped part, draw carved wavy lines - like a real oak leaf. In some places you can slightly go beyond the edges of the sketch outlines - or, conversely, not reach them. It doesn't matter. Your drawing should not exactly repeat the photo. After all, no two leaves are exactly alike. You also need to slightly change the lower part of the leaf - making a stem from a simple line.

There is very little left. Erase any extra pencil lines left over from the sketch using an eraser. And then draw the veins of the leaf. It's very simple - just draw several straight small lines on each side to the vertical line in the middle.

That's all! Now you know, how to draw leaves. Moreover, not only oak ones. In the same way, you can draw leaves of maple, birch and any other tree.

Draw with pleasure!


