Vegetable garden on the window, what to draw on glass. The best ideas for decorating windows and window sills for the New Year
Applying various designs to windows for the New Year has already become a good tradition in Russia. And it is right. It’s worth decorating the windows in any way, even the simplest, and the holiday spirit is already knocking on the house. As if from a fairy tale - patterns on the glass, as if drawn by the hand of Santa Claus. And how children love to decorate windows - for them it is a prelude to the New Year's celebration.
The tradition of decorating windows for the New Year comes from the deep past. The Celts also decorated shutters and window sills with fir branches to ward off evil spirits. For the same purpose, the Chinese hung ringing decorations in front of the windows - so that the melodious bells would scare away demons with their sound.
In Russia, the tradition of drawing pictures on windows for the New Year appeared during the time of Peter I, who by his decree ordered to decorate not only Christmas trees, but also decorate homes. This tradition took root most firmly in our country during the Soviet era. At that time, windows were decorated with snowflakes, fabric compositions and, of course, toothpaste.
Since then, technology has come a long way. Appeared special washable paints for painting on glass, you can find many original templates in order to draw even the most unusual drawings on the windows for the New Year.
New Year's windows: plots and compositions
New Year's drawings on the windows They are famous for their indescribable spirit. A professional artist can use paint to create a real masterpiece on any window. What is most often depicted? Traditional New Year's stories:
- snowflakes
- Santa Claus with a bag of gifts
- shining Christmas trees
- sleigh with reindeer harnessed in it
- New Year's garlands
But you don’t have to limit yourself to just the New Year’s theme. An excellent addition to traditional plots can be:
- various faces
- funny people
- bears
- houses
- snowy landscapes
- Christmas trees
And of course, Christmas stories:
- angels
- candles
- present
- scenes from the Bible
Required condition: New Year's drawings on the window should be light, even airy, cheerful and, of course, colorful.
Samples and stencils
If you not professional artist, no problem. Nowadays it’s very easy to find a variety of templates for New Year’s themes. Using them, it is easy to create a masterpiece on glass with your own hands.
Where can I get stencils? The easiest way is to go and buy it in a store. Stationery stores and supermarkets offer big choice templates for drawings on windows for the New Year.
Please note: templates can be purchased separately or as part of a paint set
But what to do if the required samples are not found? Then we make them ourselves.
Stencil manufacturing technology
 For this you will need:
- a piece of thick Whatman paper and plastic
- scissors
- stationery knife
- tracing paper or transparent paper, or carbon copy
- pencil and eraser
- ruler and pattern
First of all, we find a sample, that is, a drawing. You can “borrow” it from a book or magazine (any drawing or special stencil), from the Internet, or draw it yourself. If you draw yourself, you can apply the composition directly to whatman paper.
We apply tracing paper to the sample and redraw it. We cut it along the contour and apply it to whatman paper, draw it. This stage can be avoided if you use carbon paper and transfer the image directly to whatman paper.
We cut out the resulting drawing on whatman paper using a stationery knife and scissors so that the outer part - the stencil - remains intact. Actually, the drawing itself can then be painted and attached to the window with soap. The stencil is ready.
Preparing to apply a pattern to the window
Depending on how the designs will be applied to the glass for the New Year, you will need different tools. But you definitely need to get:
- tassels different shapes and thickness
- toothbrush
- scrapers and sticks
- special cloth for cleaning windows
- jar for water
And, of course, you need to stock up on stencils, imagination and patience.
Features of the window painting process
New Year's drawings on glass can be applied using:
- stained glass paints
- toothpaste
- gouaches
There are also quite exotic methods. For example, a design is applied to glass with PVA glue, and then glitter and tinsel are stuck on it. Turns out funny furry drawings. But we will look at the features of the process of applying paint and toothpaste.
It is easier to apply drawings on windows for the New Year using stencils. You've already stocked up on them, haven't you?
We apply the stencil to the glass and apply it with a brush. paint or toothpaste. We wait until the paint dries slightly, then using sticks we write down the details and remove the excess. Using a thin brush we bring the drawing to perfection.
To achieve a splashing effect, wet your toothbrush with water and a little paint. Then use your finger to spray paint in front of the glass.
Tip: to make the drawing on the glass dry faster, you can use a hairdryer
But it is permissible to use a hair dryer only on the weakest setting and with a cold air flow.
Draw on the windows with your child
 Decorating a house with children is always a joy. This not only brings family members closer together and gives moments of sincere joy. You can develop real taste in children and awaken their talent for art. In addition, once you explain to your child how to draw a New Year's picture, the next time he will surprise you with his imagination and ingenuity.
Do not forget Explain safety rules to your child when painting windows: do not eat paint, do not open the window to paint outside, do not climb on the windowsill, do not lean on the glass. And then the drawings on the windows for the New Year will delight you and your guests!
Drawings for windows for the new year 2015 - photo
Below is our photo selection of window design options with application on them. New Year's drawings. To open a gallery with templates, just click on the image thumbnail.


We apply drawings to windows for the New Year - video
We also invite you to watch the video on the topic of our article. The video provides instructions for applying snowflake designs to windows using toothpaste.
Did you like the article? Subscribe to site updates via RSS, or stay tuned:
In contact with , Facebook , Classmates , Google Plus or Twitter.
Subscribe to updates by E-Mail:
Tell your friends! Tell your friends about this article in your favorite social network using the buttons in the panel on the left. Thank you!
Discuss the article
To the post “Drawings on windows for the New Year: colorful DIY decorations” 8 comments
My daughter and I love to paint windows during the New Year holidays. For these purposes, I buy special stained glass paints; they come with several templates with various images, but mostly we come up with the drawings ourselves. It turns out very colorful. But we have never used toothpaste for painting on glass; it’s a great idea, worth a try.
How lucky I was to read the article. We just wanted to paint the windows with the children for the New Year. It is a very good idea to paint them using toothpaste and gouache. I also really liked getting the splashing effect using a toothbrush. We ourselves would not have thought of this. We will use with great pleasure your ideas for painting windows from the photo selection.
I picked up a lot of interesting ideas, I especially liked the ideas with toothpaste and stencils that can be glued with soap. I did this as a child, but over time I forgot and with the advent of my children I had to come up with something. Store-bought ones are of course convenient and quick, but how fun it is to make all the decorations yourself with your children. The children were very proud that they did everything themselves, because the whole yard looks at our balcony and is jealous!
Very beautiful. I remember back in the 90s, my sisters and I created similar magic on the windows. For this they used gouache paints, the drawings were taken not from the head, but from the plots New Year cards. Thus, our windows acquired a fabulous look. They also decorated the doors, which were then painted a dull White color. Nowadays there are a great variety of means for decorations!
New Year is a holiday that gives us a truly unforgettable atmosphere. It's no wonder that children and adults look forward to this fantastic celebration! And without what is the New Year completely impossible? Of course, without holiday decor! The anticipation of the holiday appears only when Christmas melodies begin to sound in the streets, the smell of tangerines fills the air, shop windows bloom with themed decorations, and thousands of lights are lit on trees and roofs.
Before the onset of the most magical night of the year follows. In every house or apartment, they take out boxes from the mezzanine, hang them, place them on shelves and installations, and a day or two before the holiday, they solemnly install a beautiful Christmas tree. However, one place that can also be decorated for the New Year often remains completely unclaimed.
Cardboard and colored paper will allow you to create an unforgettable New Year's decor!
We are, of course, talking about windows! There are many simple but amazing ideas for decorating glass and window sills that can give a magical mood to both the residents themselves and random passers-by. Beautifully decorated windows will not go unnoticed by guests and relatives who come to your holiday. In addition, such decor will give you the most pleasant sensations and increase your mood during the winter holidays.
Naturally, in store windows you will find a huge amount of New Year's paraphernalia, but in Lately It is fashionable to decorate a house with items that the owners made with their own hands. And so that you don’t rack your brains when choosing New Year’s decor, we have selected the most original ideas and master classes on using stickers, creating window paintings, making protrusions and garlands from the simplest materials!
Idea #1: Decorating windows with toothpaste
 Toothpaste can be used to decorate not only windows, but also mirrors in the house.
 The older generation remembers very well that during periods of Soviet shortages, toothpaste was the main tool for creating New Year's decor. It was used to paint not only apartment windows, but also the windows of schools or kindergartens, involving children in this fascinating process. It is worth noting that toothpaste is a universal artistic material that allows you to create several types of painting at once - both ornamental and negative.
In the second type of painting, the design is similar to the image of a photographic film, that is, it is the dark, unpainted places that become the accent. By the way, this is the simplest type of painting that even a child can easily handle. Be sure to involve the kids in the process of creating fabulous pictures on the windows! Another positive point is that after the celebrations are over, you can easily clean the windows from the pattern by simply wiping the glass with a wet cloth. Before you get started, you need to prepare:
- foam sponge or old toothbrush;
- a piece of adhesive tape;
- a bowl;
- water;
- scissors;
- a cloth;
- pencil;
- paper.
Procedure
 Step-by-step instruction for decorating a window with toothpaste
 - 1. Download several of your favorite New Year’s themes from the Internet. These could be Christmas bells, snowflakes, reindeer, penguins, Christmas trees or Santa Clauses. Print the designs on paper and cut out using scissors. It is better to first prepare stencils with small details by shading with a pencil the places that need to be cut out, so as not to make mistakes in the process.
- 2. Wet the template with water, immersing it in a bowl for just a couple of minutes. You can also place the template on a flat surface and walk over it with a wet sponge.
- 3. Stick the template to the selected location on the window glass.
- 4. Gently blot the paper with dry flannel.
- 5. Squeeze the toothpaste into a bowl and dilute with water until it becomes liquid sour cream.
- 6. Take a toothbrush, dip it in the paste, shake it off a little and, running your finger along the bristles, spray the mixture onto the window where the stencil is glued. When the paste evenly covers the window, peel off the paper. The drawing is ready! You can also use a piece of foam sponge for this purpose - soak it in the paste, shake off excess moisture, and then lightly press it onto the glass around the stencil.
If you have at least the minimum artistic skills, you can paint the window manually, but for this purpose you will first have to make yourself a brush. To do this, twist the foam rubber into a tube and wrap it with a piece of tape. It’s better to make a couple of brushes with different diameters to paint both large and small details. Squeeze the paste onto a plate, dip the brush and draw fir branches, snowmen, Christmas tree balls and streamers.
When the paste has dried, take an orange manicure stick or toothpick and scratch small details - dots or stars on balls, eyes on snowmen or needles on spruce paws. Using the same principle, you can create window paintings painted with gouache paints or artificial snow from a spray can.
Idea No. 2: Snowflake stickers
 Children will like handmade snowflakes much more than store-bought ones!
 A snowy winter with soft fluffy snowdrifts is the dream of most children and adults. After all, it’s so nice to go sledding, build a snowman, have a snow fight, or go for a walk in the forest! Unfortunately, not every New Year brings us snow, and slush spoils the entire holiday experience. However, you can create a snow whirlwind at home. To do this, you need to decorate the windows with unusual stickers made from PVA glue.
Who would have thought that such simple material Can an unusual decor be created? During the day, while it is light outside, the snowflakes seem almost transparent and do not interfere with the view. But in the evening, when the moonlight or rays of lanterns fall on the window, it sparkles like real frost! By the way, this decoration can last for more than one year - just carefully remove the snowflakes, line them with paper, put them in a box and send them to a dry place until the next New Year. To make snowflakes you need to have:
- paper or ready-made cardboard or plastic stencils;
- strong film or paper files;
- a jar of PVA glue;
- medical syringe (no needle required);
- brush;
- glitter (you can use those used for manicure).
Procedure
 Step-by-step instructions for creating and decorating snowflakes
 - 1. Place the stencil inside a plastic file or place it between layers of film. If you don't have a ready-made stencil, choose one to suit your taste, print them on paper and place them in a file.
- 2. Trace the stencil lines with adhesive mass, squeezing it out of a medical syringe in a thick layer. Correct the drawing with a brush. Important: do not get carried away with making openwork snowflakes! Small details will most likely just blend into the overall mass, so choose patterns with simple lines and large curls.
- 3. Carefully move the stencil to a windowsill or other place located near heating appliances. Let the drawings dry a little. When the glue becomes transparent, but not completely dry, remove the frozen snowflakes from the film and glue it to the window.
- 4. To make shiny multi-colored snowflakes, repeat all the manufacturing steps, only sprinkle the workpiece with multi-colored sparkles before sending it to dry.
Idea No. 3: Vytynanka for windows
 An example of a window decorated with Christmas decorations
 Idea No. 9: Compositions from pine needles
 can be made from many natural materials!
Traditional decor cannot do without compositions of fragrant pine needles, which fill the house with an incredible aroma. The easiest option is to make small wreaths and hang them on the windows using bright satin ribbons. To make this decoration you need to prepare:
- spruce branches (you can supplement them with thuja or juniper branches);
- heat gun;
- wire (thick and thin);
- viburnum branches;
- New Year's balls;
- beads
Procedure
 An example of minimalist window design using pine needles
 - 1. Take two pieces of thick wire and bend them so that you get rings of different diameters (the difference should be about 3-4 centimeters).
- 2. Wind the rings diagonally with thin wire to make the frame of the future wreath. Make a fastener from a long piece of tape.
- 3. Separate the branches into bundles and attach them to the wreath, overlapping each other.
- 4. Add small cones, balls, beads, rose hips or viburnum, attaching the decor with a heat gun.
- 5. Cut a piece of ribbon and tie a fluffy bow, attach it to the top of the wreath.
By the way, spruce wreaths can not only be hung on the cornice, but also simply placed on the windowsill, and a thick candle should be placed inside such a decoration.
Idea No. 10: Garlands made of cotton wool
 Step-by-step instructions for making a garland from pieces of cotton wool
 Decor for window openings can be made from the simplest items that are found in every home. For example, from cotton wool. To make a garland, you need to prepare a large number of cotton balls, roll them up to make them denser and string them on a long fishing line, hanging them in the window openings. Alternate lumps of snow with snowflakes made from napkins - this way your craft will become airy, and the illusion of falling snow flakes will appear in your apartment.
Idea No. 11: Garlands made from cups
 Master class on creating a decorative luminous garland
 You can also make an unusual decor from paper cups by making transverse cuts (crosswise) in the bottom with a stationery knife. Then insert the light bulbs into the holes and attach the garland to get original shades. If you don't have suitable paper cups, you can do the same manipulation with plastic cups. In this case, you will need to decorate them - these can be strips of colored paper or ordinary napkins with a pattern placed on glue.
Idea No. 12: Panorama with a winter forest and animals
 Multidimensional paper panorama for Christmas and New Year
 We have already told you how you can create a fairy-tale village or a city sparkling with lights on your windowsill, but the panoramic crafts don’t end there. On the window you can arrange a magical panorama clearing with Christmas trees and animals. To work you will need:
- paper;
- scissors;
- pencil;
- garland of LED light bulbs.
Procedure
 Making a paper installation with an LED garland:
 - 1. Glue together several sheets of office paper so that their total length is equal to the length of the window sill. Make 2-3 such blanks so that the panorama has several layers.
- 2. Find and download drawings on New Year's theme- Christmas trees, bunnies, bears, penguins, snowmen or deer are perfect for this purpose.
- 3. Cut out the stencils and transfer them to a paper strip, placing the drawings continuously one after another. Before drawing, step back 5-6 centimeters from the bottom edge and bend the sheet so that you can then place the panorama on the windowsill.
- 4. Arrange the panoramas on the window so that the taller figures (for example, trees) are located near the window, and the lower ones stand on the edge of the window sill.
- 5. Lay an LED strip or a garland with light bulbs between the layers and light it to get a real fairy tale on the window.
There are two ways to create a joyful festive atmosphere in your home: visit a supermarket or New Year's fair to buy ready-made decor, or decorate the interior with window applications, paper toys and hand-made compositions. The most successful is considered a compromise option, in which factory-made garlands, candles and balls are complemented by unique handicraft garlands, toys and crafts.
Natural composition of dry branches
Used for making home crafts or painting on glass. various materials, which are easy to find in the bathroom or kitchen: toothpaste, pieces of soap, starch or flour for paste, tape. Toothpaste can be easily replaced with white gouache, but it has been used for a long time and willingly because of its suitable properties: even dried “Aquafresh” or “Silka” is easily washed off clean water Moreover, it has a light pleasant smell.

If you don't have real balls, you can always draw them
In addition to adhesives and coloring compounds, everything that can be found in children's corner, school table or in a box with New Year's accessories:
- thick cardboard;
- colored paper;
- multi-colored foil;
- bugles and beads;
- beads and sequins;
- old Christmas tree decorations;
- pieces of fabric, yarn and leather;
- wooden and metal parts;
- tinsel;
- chains, etc.
The choice of material depends on the craft. For example, wonderful window decorations for the New Year are made from plain white paper. These are primarily snowflakes, Christmas trees and themed origami toys. Thick cardboard is useful for making stencils or templates for drawings on glass, and strips of colored paper are useful for a fun garland chain that can be used to decorate a window opening.

Paper Christmas trees and stars - traditional New Year's figures on the window
Permanent home “helpers” are usually used as tools:
- scissors;
- stationery knife;
- sewing needles (with a set of threads);
- brushes of all sizes;
- sponges;
- toothbrushes;
- wire cutters, etc.
Almost everything listed tools and materials can be found at home, and if some are missing, they can easily be purchased at the store, spending a very modest amount.
How to decorate a window for the New Year
Usually, not one specific place in the apartment is decorated, but all or some rooms, so the decoration of windows for the New Year should be harmoniously combined with the decoration of the rest of the interior. This is expressed in the selection of identical shades, repeating motifs, patterns, and ornaments. Some people like the white and gold holiday color scheme, others like an abundance of red, and others like the combination of blue color with a silver tint. It’s better to start preparing when the main style has already been chosen and the palette has been determined.

Sometimes just white is enough
Paper decorations
If you have no experience in preparing for the holiday or don’t have enough free time, we offer the simplest and most advantageous option - decorating windows for the New Year from sheets of paper, white or colored. Even kids who have barely learned to hold scissors in their hands are happy to cut out snowflakes. Usually a simple but effective procurement scheme is used:

This is how you fold a sheet of paper to cut out a 6-sided snowflake.
You can come up with hundreds of beautiful openwork patterns by experimenting with trimming the edges of the workpiece. More experienced fans of preparing for the New Year have their own “branded” patterns, and beginners can borrow ready-made templates to start with:

To cut a realistic snowflake, you need to try

Complex circuits, but worth it

Original options for 8-, 6- and 4-gonal snowflakes
Having cut out a large number of snowflakes of different sizes and shapes, you can glue them to the glass using paste or soap solution in different ways:

In the form of a New Year tree and in a chaotic order
The paper is also suitable for creating flat or three-dimensional compositions of houses, winter trees, animals, fairy-tale characters.

New Year industrial landscape on the windowsill and city sketches on the glass
Drawings using templates and stencils
To make the hard work of amateur decorators easier, they came up with templates and stencils. Ready-made New Year-themed kits can be purchased in a store or downloaded from the Internet, and then printed and used for the New Year to transfer images to windows.

Christmas scene on the night window
How are templates different from stencils? The templates are outlined, and then the drawing is painted or left in its original form. Stencils are usually used immediately for painting, although you can also trace along the inner contour.
Spray technique using a stencil
The photo instructions show a mirror, but to transfer it to window glass, the same steps are performed.
Cut out a snowflake from paper (outlines of a house, animal, tree).

Using soapy water, glue the snowflake onto the window. Can also be used plain water, because after painting the stencil will have to be peeled off immediately.

We dilute the toothpaste with a small amount of water, but so that it does not drain, but remains slightly thick. Take a toothbrush and dip it in the prepared solution.

Using your finger, we move the bristles of the brush and release it sharply so that the splashes purposefully fall in the area of the stencil. It looks beautiful when there are more splashes in the center, and they disperse along the edges.

Carefully peel off the paper stencil, being careful not to smear any splashes.

It turned out easy new year image snowflakes. To decorate a window with similar designs, you will need very little: half a tube of toothpaste, an old Toothbrush and stencil paper.

When working with stencils, you can use a dishwashing sponge instead of a brush. We cut off a piece of soft foam rubber, roll it into a roll, and tie it with thread or tape to form a kind of “brush.” Then we blot the cutouts on the stencil.

Sponge technique
A few more fun stencils and templates for windows for the New Year:
Decorative pendants and garlands
It is customary to hang garlands everywhere: on the Christmas tree, on the walls, under the ceiling. They decorate the outside of houses, decorate trees in the garden and small architectural forms in the yard. This is also a suitable decoration for windows, because curtain rods are successfully used as a mounting point.

Garland of artificial greenery with pine cones and snowflakes suspended on threads
A garland can be made from anything; in fact, it is various objects suspended on a thread or ribbon. Traditionally, flags, light New Year's balls, stars, and decorations made of beads or bugles are strung on a thick thread or strong cord. Children love to make lanterns or caps from colored paper and attach them to a string mixed with snowflakes and pieces of cotton wool to represent snow.

Luxurious natural composition against the background of homemade garlands
Instead of long garlands, you can use laconic but elegant decor - New Year's pendants made of Christmas decorations, tinsel and bugles.

Pendants made of Christmas balls on satin ribbons and a sparkling gold and silver garland

Stars on the kitchen window, unexpected citrus decoration, hearts, dolls
DIY window sill decorations
To make the window truly beautiful for the New Year, according to tradition, not only the glass, but also the window sills are decorated. Fantasy lovers winter holiday knows no boundaries: along with the usual Christmas trees, Snow Maidens and Santa Clauses, natural compositions from branches and moss, romantic arrangements with candles, and snow-covered doll houses appear.
Remember the magical snow globe, inside of which, when you shake it slightly, real snow begins to fall? It’s difficult to make such a toy with your own hands, but we’ll look at how to decorate a windowsill for the New Year using ordinary glass jars. Behind the glass, like in that ball, is a small winter fairy world with houses, forest animals and fir trees.

New Year's gifts under tin lids
There are two options for designing compositions in jars:
- at the bottom of a jar closed with a lid;
- on the lid of an inverted jar.
Both options are equally popular, but the second - with an inverted jar - is more often used if the vessel is too deep and it is difficult to reach the bottom. Arranging items on the lid is much easier.

Figurines under a glass cover
Brief instructions for making crafts from inverted cans:
- we find several glass jars of different sizes with screw-on lids;
- lay the inverted lids upside down;
- we place miniature figures of animals, snowmen, people, as well as Christmas trees, houses, etc. on the lids;
- we tighten the jars, checking that the figures are the right size;
- If the composition is successful, open the jars and glue the selected items.
Then we finally tighten the jars - original jewelry Ready for the windowsill for the New Year!

You can make beautiful candlesticks from the same glass jars. We paint the glass walls by hand with paints that do not emit harmful substances when heated, and we place small candles inside the vessels. We decorate the upper part with bells, mini-garlands, and tinsel.

Magic lamps for the windowsill

Candlesticks with cones

New Year in glasses
Unusual and at the same time natural compositions are made from natural materials: cones, coniferous branches and deciduous trees, moss, acorns, dry grass, driftwood, etc. They combine perfectly with artificial snow and serve as an excellent background for miniature figures of bullfinches, deer, hares, and bear cubs.

"Trees" from dry branches
You can build a snow-covered “tree” from dried branches and secure it in a jar or vase. To enliven the picture, we plant bullfinches, tits or woodpeckers on the branches. But since the tree is New Year’s, and therefore magical, anything you want can grow on it: gingerbread cookies and sugar gingerbread cookies, golden beads and small Christmas tree balls, key chains with photographs of relatives and just satin bows.

Just pine cones growing from little chocks
The composition can be made much brighter if glass vase replace it with a gilded bottle, and cover the branches along with the decorations hung on it with sparkles. The easiest option is to buy decorative hairspray, silver or gold, and carefully treat each branch.
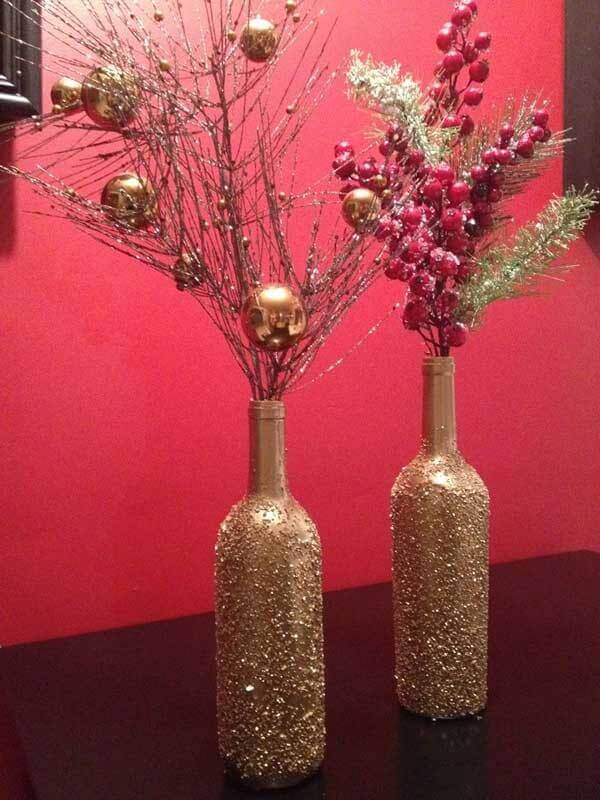
Both golden balls and red berries look festive
When we decorate a window sill for the New Year with our own hands, we always try to add something personal and individual, so homemade compositions look warmer, homely and family-friendly.

Candles and illuminations
Twinkling lights are an essential component of both a fun and mysterious winter holiday. Even simple white pictures on the windows for the New Year look different if they are illuminated with multi-colored garlands or candles. If the frame of a window made of Christmas tree or pine branches is enlivened with sparkling illumination, it will look much brighter and more positive.

The theme of lanterns-candlesticks is played out in an interesting way
To make candles look more status and solemn, they are placed in bronze or crystal candlesticks and decorated with tinsel, “rain” or beads. But there are many options when you can create a cozy and romantic atmosphere without pretentious candlesticks.

Candlestick “house”, which you can make yourself from a sheet of plywood and an exquisite vintage arrangement
Options for installing candles on the windowsill
Electric garlands are the most spectacular New Year's entourage. Neon, white, multi-colored lights turn even the most boring environment into a festive one. Often, thin threads of electric garlands are used to decorate the New Year tree, and they are also hung along the walls or from the ceiling. They look no less advantageous as decoration for windows and window sills.

Illumination of a winter composition on the windowsill

Pendants made of stars and a luminous branch in a vase
New Year's windows as part of interior design
When decorating a room for the New Year, you must adhere to the rule of proportionality. If you decide to decorate a chest of drawers, a window, a table in the center of the room, and even install a Christmas tree, then you need to do this extremely carefully. A large number of bright jewelry turns light festive the atmosphere is like a booth and quickly gets boring. Sometimes a simple design of window glass is enough.

Snowflakes with toothpaste instead frosty patterns
You can create an unobtrusive festive backdrop using identical flickering electric garlands hung in different parts of the room.

Illumination of the room with electric garlands
Sometimes one barely noticeable touch reminds of the upcoming celebration.

Paper round dance from Christmas trees
With New Year's decor, even the winter landscape becomes cozier and warmer.

Window to the terrace
With the help of festive decoration you can emphasize the style of the room.

Christmas color scheme in country style
Video: how to decorate windows for the New Year
Video sequence with interesting ideas:
How to cut paper stencils:
Snowflakes made using toothpaste stencils:
New Year's town from whatman paper:
Decorating windows for the New Year is useful, interesting and enjoyable. If you devote several evenings to this creative activity, then by the holiday the interior of the room will be magically transformed: snowflakes will appear on the glass, and fabulous compositions of homemade crafts will appear on the window sills.
Dear friends, today I continue the theme of decorating windows for the New Year. I will share with you the stencils that I especially like. I'll tell you how to make New Year's drawings on windows using them. Let's talk about whether it is possible to change the dimensions of a template in Word and Excel and what to do if you don’t have a printer at home, but you need to transfer the image to paper.
Well, of course, we’ll look at the most painstaking work, - cutting out. Its result directly affects the beauty of the New Year's window. Well, let's understand all the intricacies of New Year's paper drawings, which are also called vytynankas.
Stencils of New Year's drawings for paper windows
How do you like this winter's tale from plain paper? The result is a wonderful composition. As you can see, it consists of several stencils: Forest Glade, deer, snowflakes, the moon and other little things.

I really like this New Year’s scene on the window, it’s simply mesmerizing.


And another stencil of the New Year's city.

If you make Santa Claus like this on a paper window, although he looks more like Santa Claus, it will be fun.
Here is another stencil of the main wizard of the New Year.

If you want to decorate a window with a drawing of Father Frost and the Snow Maiden, familiar to us from childhood, then take this template.

You can decorate the window with a New Year tree and a sleigh with gifts. Look how wonderful they are.


These patterns of festive balls, icicles and bells will look very elegant and gentle on the window.


I would like to present you with another template - this stencil, in my opinion, should turn out to be very interesting.

What do you think of this template? I think it will be the perfect New Year's drawing.


And, of course, what would it be without a Snowman and holiday candles. I think you will like these templates as much as I do.


New Year's stencils for windows made of paper
How to print
After you have decided on a template for a New Year's drawing, beginners may have a question: “How to print a New Year's stencil and how to make it larger if it turns out to be small.”
There's nothing complicated about it. I will offer you three options, and you give preference to the one that is convenient and easier for you.
Working in Word
In order to start working in Word, save the template you have chosen to your computer. Then open Word. Next, click “Insert” and “Drawing”. A window will appear in which you need to select your template.

As you can see, the drawing is small, it will be barely noticeable on the window. In Word you can stretch it to the size of a sheet. To do this, point the arrow at the picture and press the left mouse button. A frame will appear around it. By stretching it, the picture enlarges.
If the lines of your drawing come out pale, you can strengthen them. Again, move the arrow to the picture, press the left mouse button and when the frame appears, at the very top of the screen you will see the inscription “Format”. Click on it. We look for the word “Correction” in the same panel and click. A drop-down menu will open. In the “Sharpness Adjustment” section, select your template with an increase of 50%.

I've made the page smaller so you can see how I managed to stretch the image across the entire page.
Working in Excel
If you want to get a much larger picture, then you won't be able to do it without Excel. Let's go to this program. Just like in Word, click “Insert” and “Drawing”. In the window that appears, look for your template.
Move the arrow to the picture and click on the left mouse button. A frame will appear, with which you need to stretch the picture. In Excel, this can be done to very large scales, both downwards and to the side, only then the drawing will consist of several parts. The program itself will separate the drawing for printing. I got 8 sheets.
Translating the stencil using paper and pencil
If you don't have a printer at home, use the third method. By the way, it can be applied after working in Word and Excel, when the picture is enlarged.
We take any template that you like.
Point the arrow at the picture and press the right mouse button. A list appears from which you need to select “Open image”.
The image will open in a separate window. It will be small, but you can make it full screen. To do this, hold down the Ctrl button, and without releasing it, press “+” again until the picture fills the entire screen.
After that we take Blank sheet paper, apply to the screen. We arm ourselves with a pencil and redraw the picture. With the backlight from the monitor this will be easy to do.
How to cut paper stencils for windows
To cut out a stencil, you will need small scissors, a knife and some kind of wooden or plastic board so that the table does not get damaged while working with a sharp tool. The ideal knife for this is a wallpaper knife. It can be bought at any hardware store.
We cut out the main design with small scissors, but all the internal contours with a small knife. We do everything so that the black lines of the stencil are on the part that will be removed.
How to glue a paper stencil to a window
It seems that this is elementary, however, there are many but... Some glue with ordinary water or soapy water, while for others such stencils disappear. Why is this happening? It all depends on the window itself. If it is dry, then it is enough to moisten the stencil with a liquid soap composition or walk it over the glass and then stick it on. But the design will not always remain on glass that sweats. Therefore, to say: “Guys, stick like this and everything will be fine” is not entirely fair.
Each window requires an individual approach. It is necessary to take into account, as I already said, whether it is crying or not. What temperature is in the room - cold or warm - this also has an effect. Here everything is individual, as they say at random - it holds, it doesn’t hold. All I can offer you is to tell you about all the different methods used for gluing paper stencils. I think one of these versions will definitely suit you.
- Soap composition or simply rub with well-soaked laundry soap.
- Transparent tape, but it leaves an imprint on the glass.
- Diluted toothpaste, but not very rare.
- Kefir, as strange as it may seem, people use this drink too, but it will also cause stains on the window and if you have a cat, the decoration will not last long, as you understand.
- Flour paste, which is prepared on the basis of flour and water. The consistency should be like sour cream. But again, there is the issue of stains on the glass during washing in the spring.
- Starch paste is diluted starch.
- Dry glue stick.
- Another gluing option is with regular milk.
- Sugar syrup - boil and then glue.
- Prepare the gelatin liquid as usual, but add a little more water than indicated in the recipe.
- Double-sided tape, it is hardly noticeable on the glass, it can be easily removed, but then you need to carefully wash off the traces.
- Men's shaving cream, dissolve in a small amount of water. The composition should not be liquid.
As you can see, everyone sticks differently, so make a choice, try it and then you will know exactly which method suits you.
My article about New Year's drawings on windows was quite lengthy. I hope you liked the cutting stencils and that the master class was interesting and understandable for you. I wish everyone good luck and, of course, patience, because in order to prepare such templates you need fortitude and inspiration.
I wish everyone happiness, Natalia Murga
If on the eve of the New Year the weather outside your window is not entirely frosty and snowy, but you still want to admire real winter landscapes, then there is a simple and original way this can be achieved without much expense. Frankly speaking, this method is quite relevant even when winter pleases you with its beauty to the fullest. After all, frosty drawings on windows for the New Year are always fun, beautiful and festive! In addition, this is a simple and affordable option to quickly and originally decorate glass in your home, kindergarten, school. As a rule, paper templates and stencils are used to draw New Year's designs on windows. As for the materials used for this purpose, stained glass paints, gouache with a brush, artificial snow in a can. By the way, the latter can be easily replaced with regular toothpaste/powder and an old brush. More ideas and examples in step-by-step master classes with photos of drawings on windows for the New Year 2018 Dogs further.
What can you quickly and easily draw on the windows for the New Year in kindergarten - master class with photos
There are quite a lot of options for what you can quickly and easily draw on the windows for the New Year in kindergarten. But we want to offer you a drawing that will not take much time to complete and will be one of the most budget options. Learn more about what you can quickly and easily draw on windows for the New Year using stencils in kindergarten from the lesson below.

Necessary materials to quickly and easily draw on the windows in kindergarten for the New Year
- toothpaste
- kitchen sponge
- adhesive tape
- New Year's stencils
- skewer
Step-by-step instructions on what and how to simply draw on the windows for the New Year in kindergarten

How to draw frosty patterns on a window for the New Year with toothpaste - lesson with photos step by step
The next technique for drawing frosty patterns on a window for the New Year with toothpaste is even simpler than the previous one. In addition, this is also a very fun way to spend quality time with children, who will happily take part in such decoration. Read about how to draw frosty patterns on a window for the New Year with toothpaste in the step-by-step lesson below.

Necessary materials to draw frosty patterns on the window for the New Year with toothpaste
- toothpaste
- old toothbrush
- paper snowflakes
Step-by-step instructions on how to draw frosty patterns on windows for the New Year with toothpaste

Beautiful drawings on windows for the New Year 2018 with gouache and a brush, step-by-step lesson with photos
With a brush and gouache you can also draw very beautiful pictures on the windows dedicated to the theme of the New Year 2018. Since the technique of applying gouache to windows itself does not differ from the usual way drawing, we will show it using an example with paper. And you, having mastered a beautiful drawing on paper with gouache and a brush for the New Year, will cope with the image on the window without much difficulty.

Necessary materials for a beautiful drawing on the window for the New Year 2018 with gouache and a brush
- gouache
- small flat synthetic brush
Step-by-step instructions for beautiful drawings for the New Year 2018 with gouache and a brush on the window with your own hands

Original drawings on windows for the New Year with glue-paints - step-by-step master class with photos
Glue paints are an ideal option if you want to decorate windows for the New Year with your own hands with original three-dimensional designs. If such paints are not available in stores in your city, you can easily make them at home. To do this, you need to mix gouache, PVA glue and starch in equal portions. The finished mixture should be poured into a convenient tube with a spout and you can begin applying an original design with your own hands to the windows with glue paints for the New Year.

Necessary materials for an original drawing on the window for the New Year using glue-paints with your own hands
- New Year's stencils
- glue-paint
- baking paper, transparent file or cling film
Step-by-step instructions for original do-it-yourself glue-paint drawings on windows for the New Year

Thematic drawings on windows for the New Year 2018 Dogs, stencils and templates
Since the coming New Year 2018 will be held under the auspices of the Dog, it is logical that thematic designs on windows, which can be applied using stencils and templates, will be especially relevant. It is believed that any image of an animal symbol in the house contributes in every possible way to well-being, prosperity and good luck throughout the year. In addition, thematic drawings on the windows for the New Year 2018 Dogs (stencils and templates below), like real watchdogs, protect their owners from everything bad. Therefore, if you want to draw a New Year’s dog on your window, then take a closer look at the options for drawings that we have collected in the selection below.


What original things can be drawn for New Year 2018 at school on a window or glass (photo)
Decorating school windows with drawings on the eve of the New Year is a fairly common creative practice. Often there are even entire competitions between classes on the topic of whose office windows can be called the most festive and beautifully decorated. Therefore, the question of what original can be drawn for the New Year 2018 at school on windows and glass is relevant for many students. If we consider that children's imagination has no boundaries, then there can be a great many options for such New Year's drawings. And to inspire you to get creative, we suggest taking a look at a selection of original pictures that you can draw on glass/windows at school for the New Year.


Frosty drawings on windows for the New Year 2018 with toothpaste - templates and examples
Because in their own way external characteristics toothpaste is very similar to frost, it is quite actively used to apply frosty patterns on windows on New Year's Eve. The templates and examples that you will find below are direct confirmation of this. Most often I use toothpaste to imitate frosty patterns, but it is also suitable for drawing snowy landscapes and other New Year's pictures. By the way, to make such patterns on windows you can use not only toothpaste, but also tooth powder. It should also be diluted with water in proportions of approximately 1:1. The consistency of the painting mass should be quite liquid, but with intense color. To apply frosty designs on windows for the New Year 2018 using toothpaste according to a template, you can use a brush or a foam sponge.


What to paint on glass with stained glass paints for the New Year at home, video step by step
Frosty drawings on windows for the New Year 2018 Dogs at home, at school, in kindergarten, you can draw and stained glass paints, which are ideal for working on glass. Unlike the technique with toothpaste, brush and gouache, working with stained glass paints requires certain skills and strict adherence to instructions. In order to paint a thematic design on glass with stained glass paints for the New Year at home, you can use ready-made templates and stencils with symbols. These paints are also suitable for drawing subtle frosty patterns and small details. You can see the step-by-step process of working with stained glass paints on glass in the video tutorial below.


